As the cameras built-in to cell phones get better and better (and indeed every year the improvement has been significant), more and more people are using their phones instead of dedicated scanners for duplicating documents and photographs.
There are many iPhone apps for scanning documents, such as CamScanner Pro, Doc Scan Pro, Genius Scan+, JetScanner, Prizmo, Scanner Pro, TurboScan, and the genealogy-focused Shoebox (now owned by Ancestry.com).
Android also has their share of apps, like CamScanner, Document Scanner, Droid Scan Pro PDF, Handy Scanner Pro, Mobile Doc Scanner, and there’s also an Android version of Shoebox.
Other popular apps like Evernote are also suitable for this kind of document and photo scanning.
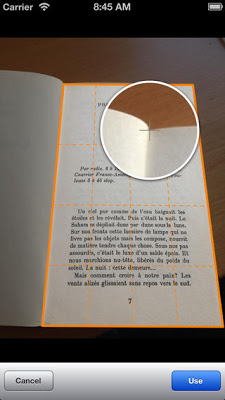 |
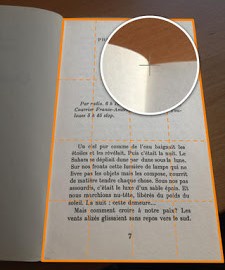
| Perspective correction in Genius Scan+ |
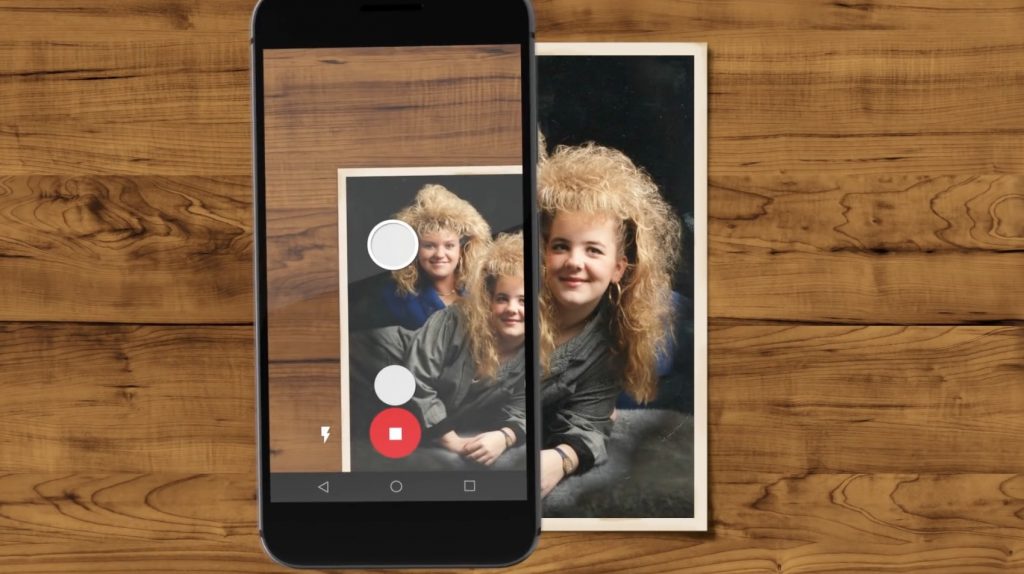
Most if not all of these apps do something pretty neat, which is that they will take your document or photo and if the corners are not 90 degrees, it will correct the perspective. This is necessary because most people holding a camera in their hand cannot possibly get the camera lens to be perfectly parallel to the document or photo they are photographing. This causes the photo they take to be skewed (where for example one side of the photo is smaller than the other side), and thus the need for this correction technology.
The problem with this technology is that you can never correct something like this without losing some quality. Wouldn’t it be better if you could insure your phone was parallel to the document when you take the photograph? When people traditionally took photographs of documents, they used big bulky copy stands. They are generally bulky and expensive. So what solution exists for your cell phone? Turns out this is a problem several people have taken a look at, and there are some very interesting solutions.
ScanDock
Let’s start out with free. Designer Kyle Koch has designed a cardboard stand he calls the iPhone Document Scanner, which he provides the plans for in EPS format. You can print out the designs and cut these out using cardboard or other materials yourself.
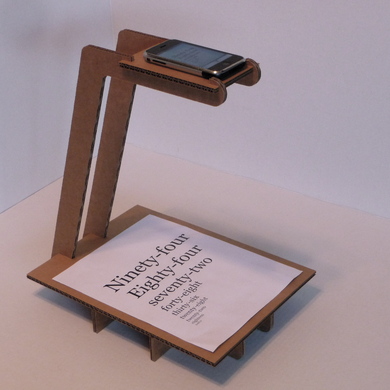 |
| ScanDock |
If you want to order it pre-made, it’s also available from Ponoko in either corrugated cardboard or MDF. A newer version, called the ScanDock (maybe soon to be ScanDeck as there is another ScanDock – see below), is available only in cardboard, and the plans are not available for free. Oddly, the different products all have different and bizarre shipping options. The best option seems to be the ScanDock which costs $25 and can be shipped to the contiguous US for $8.50. If you’re in New Zealand, shipping is only $3. I think this is really just a good do-it-yourself solution, I’m not sure I would pay for this over the options that follow.
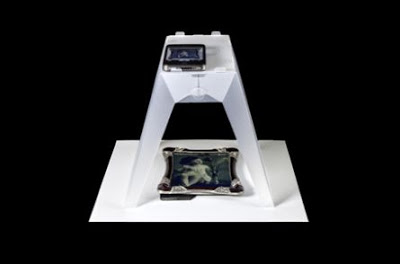
Another option is a series of stands from Scottish photo accessory company Modahaus, which they call Steady Stands. These stands are manufactured out of plastic, and are design to diffuse the light that hits the document or object inside the stand, which helps eliminate harsh shadows.
 |
| Steady Stand 200 |
The Steady Stand comes in a variety of sizes, and can be used to photograph physical objects, or used to create videos by dragging the whole stand over an object or document (such as a map) to create steady videos. I could see using the smaller one as a kind of Flip Pal replacement. The downside is that the FlipPal doesn’t need lighting, the plus side being that you don’t need to bring a full scanner with you, and the object you’re scanning doesn’t need to be flat. The smallest stand is £15 (yes, that’s British Pounds – currently about $23.37) and the largest is £31.20 (currently about $48.62)
ScanJig
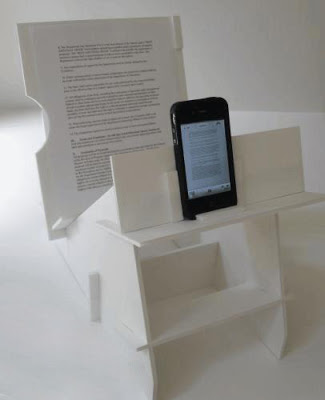
The only solution I’ve seen that doesn’t shoot straight down onto a flat document, is the ScanJig. The ScanJig is also unique in that is designed to work with a larger variety of devices, from iPhones up to iPad Minis. There is a separate version for the Galaxy III and IV phones as well.
 |
| ScanJig |
This is perhaps the most complicated stand in terms of setup. I’m not sure sure this is something I’d want to carry around with me. For some types of documents and workflows, this might be a good solution. I image if it’s on your desk and you’re copying lots of sheets of paper, this might be easier to swap out pages quickly. The ScanJig is currently $29.95 (although it says it is regularly $39.95) plus shipping (which was $4.95 to Boston).
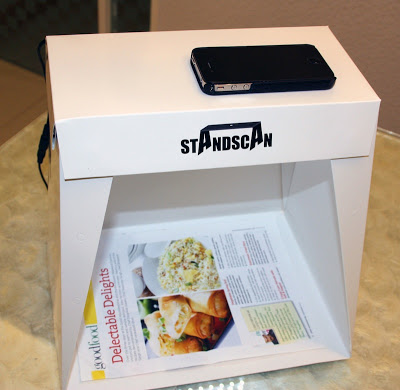
One of the most interesting solutions is called the StandScan. It has two features that I really like – it folds flat, and it has the option to add LED lighting. Of course, due to its design that has opaque walls on three sides, it’s possible the LED lighting would be required to get good quality in many lighting situations, so maybe it’s not an option after all, but a requirement.
 |
| StandScan |
You can get the StandScan with or without the LED lighting, and there are two options for powering the lights, 9V (1 9V battery) or 12V (8 AA batteries). The stand without lighting is $19.95, the stand with lighting and a 9V battery pack is $29.95, and the scanner with lighting, both battery packs and an AC adapter is $37.95. Shipping seems to be $15, whether to the US or it seems anywhere in the world (and by that I mean I check how much it cost to ship to Israel).
Scandock
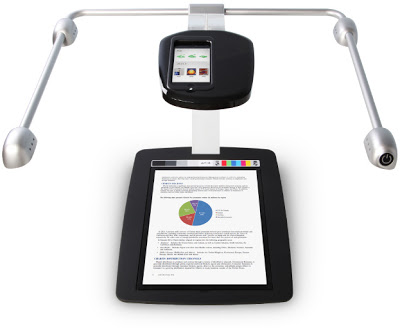
One other option is Scandock, which is built like a more traditional copy stand, with built-in lights on overheard arms, and a weighted base. It has its own camera app, which uses color patches on the stand itself to insure proper color calibration, and the stand has a silicon cover for documents to insure they lay flat.
 |
| Scandock |
In short, the Scandock is much more advanced than the offerings above, but is also priced accordingly, which the cheapest version costing $279. Also, it’s not exactly a portable solution.
Lomography Smartphone Scanner
If everything so far seems more or less the same, you won’t get this one confused with the others. That’s because this product is not for scanning documents, but for scanning photo negatives and slides. It’s from analog photography company Lomography, and it’s called the
Smartphone Scanner.
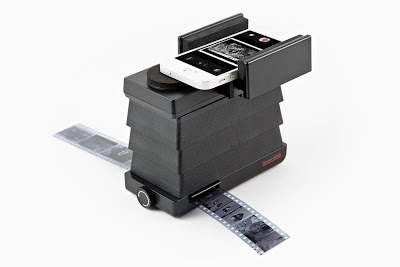 |
| Smartphone Scanner |
This device has a light source on the bottom, and you put in a transparency and scan it using your phone. It supports all iPhones and several Android devices. It has its own iPhone app, although you don’t need to use it (it is, however, helpful if the app you’re using can reverse the colors of image it captures).
The price is $59 in the US, and €59 in Europe, plus shipping. It’s also available for $59 (including shipping in the US) from photojojo, one of my favorite photo gadget companies.
Interestingly, two other phone stands were crowdfunded on Kickstarter, and succeeded in being shipped out (not as common as you might think with hardware products), but both seem to have disappeared – ScanBox and Scandy. The team behind ScanBox seems to have moved onto other products (LED light bulbs), while Scandy’s web site has disappeared completely.
I haven’t used any of these solutions unfortunately, but if one of the companies wants to send me a stand, I’m happy to review it on the blog.
Have you used any of these products? What software do you use for document scanning with your phone? Share your experiences in the comments.
