Tag Archives: photographs

Photos handed down through different family branches

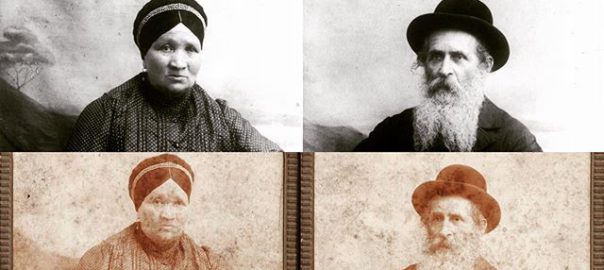
One of the first things I always recommend to those getting started in genealogy is to collect as many family photographs as possible, from the oldest relatives you know, and try to identify everyone in the photographs. There may be a time that you won’t be able to ask who the people in your family photos are, and if you don’t find out who has old family photos, they may end up being thrown out at some point. If you do have a photo, but no way to identify the person or person in the photo, there is an approach you can take that may help you to figure it out.

In one of my earliest posts (Genealogy Basics: Up, Down and Sideways) I describe why it’s important to track down collateral relatives, such as finding all the descendants of your oldest known ancestor. Besides building out your tree, these people may end up knowing more about your common ancestors than you do. Even a small piece of information, such as the town someone was born in, can help break down genealogical brick walls. Similarly, those distant relatives may actually have the same photograph you have, and they may know who is in it.

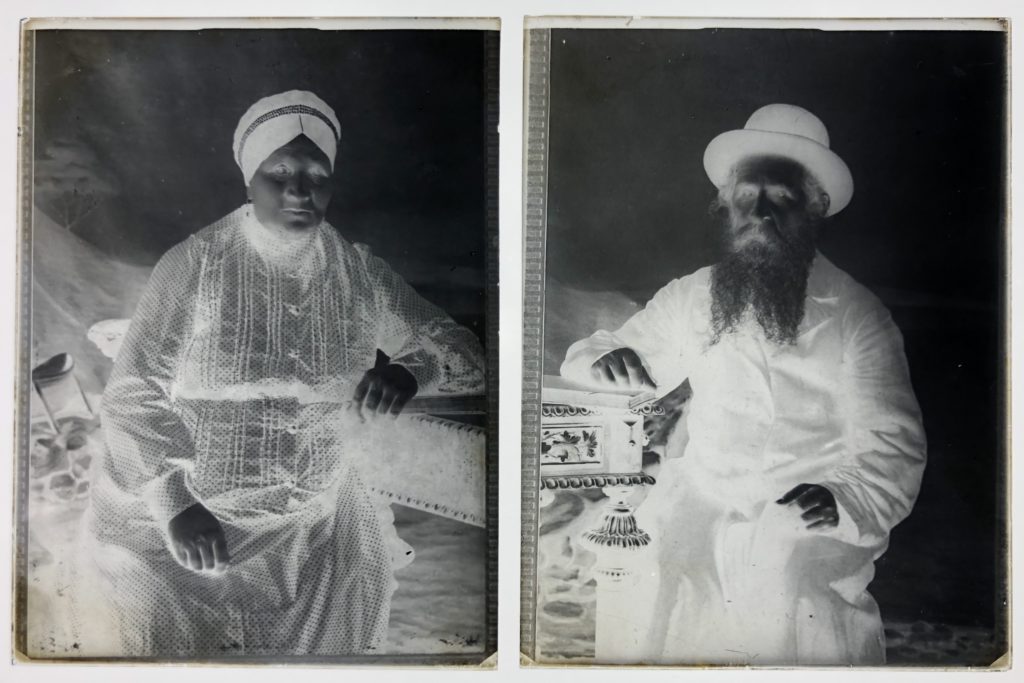
When I started collecting family photos, my grandfather gave me a set of three large glass slides that his uncle had given him. One slide had two photos on it, of the same family, one with them wearing hats, and one without hats. I had an idea of who was in those family photos, and later confirmed it. The other two slides were individual portraits of a man and a woman. I did not know who they were, and neither did my grandfather. This is what the negatives looked like:

The glass negatives
Continue reading Photos handed down through different family branches

An experiment in collaborative genealogy

While making my plans for the upcoming IAJGS International Conference on Jewish Genealogy in Warsaw, I came up with an experiment I’d like to try. This experiment needs dozens, if not hundreds, of volunteers to pull off successfully.

The short version is I’m organizing volunteers to photograph and geocode all the gravestones in the Okopowa St. Cemetery in Warsaw, and then upload those images to both BillionGraves as well as to special groups on Flickr when they will become available to everyone to use.

There are probably over 80,000 gravestones in the cemetery, and while I don’t expect we’ll be able to get to all of them by the time the conference ends, the simple effort to do so will be an incredible experiment in collaborative genealogy.

For full details on this experiment, and how to get involved, please go to the Okopowa St. Project page.

As of August 31, 2018, I’ve moved the original text of the Okopowa St. Project page to this post, so we can keep it for future reference. The Okopowa St. Project page itself will continue to point to all related articles, and give the status of the project as we seek to improve the collection of genealogy data in cemeteries.

Original Project Text:

An experiment in collaborative genealogy

Like many people planning to attend the upcoming IAJGS International Conference on Jewish Genealogy in Warsaw this August, I’ve been trying to figure out my schedule, see when I’ll be at the conference, and what else I can do to take advantage of the fact that I will be spending a week in Warsaw, Poland.

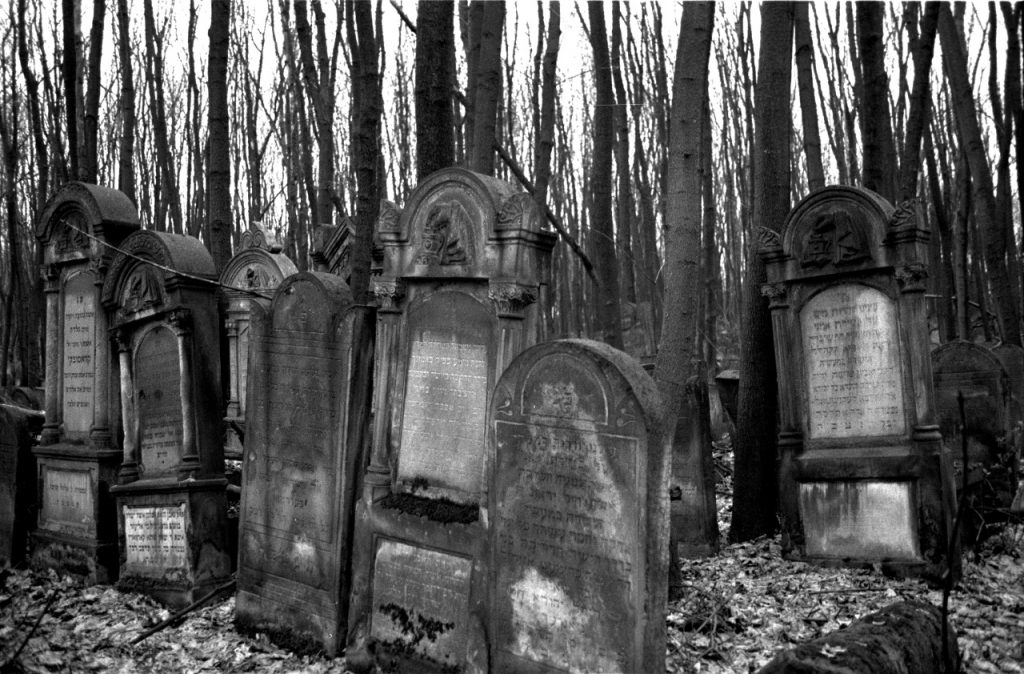
Okopowa St. Cemetery

One place I have been planning to visit is the Okopowa St. Cemetery, which I last visited 25 years ago while visiting Poland as part of the March of the Living. Most of the photos from my popular article Jewish Gravestone Symbols come from the Okopowa St. Cemetery, and I’ve long wanted to re-visit it.

The Okopowa St. Cemetery is one of the largest Jewish cemeteries in the world, and certainly is the largest surviving cemetery in Poland. As I contemplated my visit I realized that there was an opportunity to attempt something that might not be possible again any time soon. What if large numbers of conference attendees, many of who may already be planning to visit the cemetery, could collaborate in documenting all the gravestones in the cemetery? BillionGraves only has 226 photographs for the entire cemetery. Yes, I know there’s an excellent database on the Foundation for Documentation of Jewish Cemeteries (FDJC) site for the Okopowa St. Cemetery.

  • It’s probably best to think about this as an experiment in collaborative genealogy.
  • You can also think of this as an art project.
  • We don’t need to complete the project during the conference, it’s enough to see how far we can get. Part of the experiment is seeing exactly how much can be done.
  • Other visitors and locals in Warsaw can finish the project if we make a dent in it during the conference.
  • In the end, if we’re lucky, we’ll have geocoded high-resolution photos of all the graves, and the photos will be available for everyone to use in whatever projects they want to use them in. If the FDJC wants to add these photos to their site, they can. If JOWBR wants to include them, it can also do so. I’ve set up a series of steps, outlined below, which will make these photographs accessible and useful to the most people. If this succeeds, I hope people will use this model for other genealogy projects.

    Some of the things I’m hoping to find out include if the tools are the best ones to accomplish these tasks, if leaving the groups open to all, and the Google Sheet editable by all, works, or if people will abuse those freedoms. Is it too complicated to upload photos to two different sites? This will be a learning experience, whose lessons we will be able to apply to future projects.

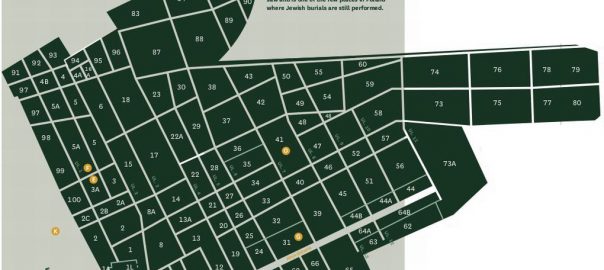
    Okopowa St. Cemetery Map
    Okopowa St. Cemetery Map

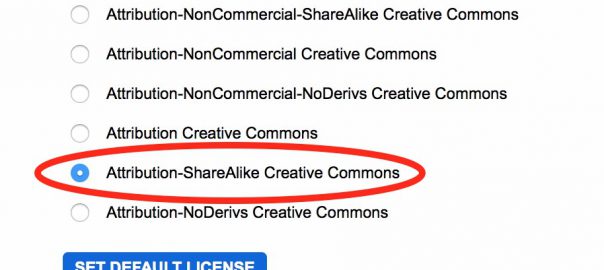
    Here’s how this will work. Volunteers will install two apps on their smart phones – BillionGraves and Flickr. They should also make sure they have accounts set up for both BillionGraves and Yahoo (the owner of Flickr), and configure the apps so that they are connected to their accounts. For BillionGraves, make sure to have the Save to Camera Roll option selected in your preferences if you use an iPhone. You’ll need that later to allow you to upload the photos to Flickr. For Flickr, log into your account on the web and set the default license to “Attribution-ShareAlike Creative Commons”. This is important, as it will allow these images to be used by anyone who wants, but still requires them to attribute the photograph to you.

    Volunteers will choose one section to photograph (larger sections will need multiple volunteers). There is a Google Sheet to coordinate volunteers. Take a look and add your name to a section. The volunteer should join the group on Flickr for the section they’ve chosen (the links to those groups are in the Google Sheet, and below). For larger sections with many volunteers, the volunteers should use the discussion area of the group on Flickr to figure out when they will be photographing, and try to divide up the work.

    When volunteers go to the cemetery, they will go to the section they’ve selected, and photograph all the graves in that section, or whatever part of it they can. They will photograph the graves using the BillionGraves app, and upload all the images to the site (this can be done later at the hotel using the free WiFi. In this first step, all the photos will be accessible via BillionGraves. In addition, when you’re done, you will go to the Flickr app and upload your photos to Flickr, and when they’re on Flickr, you will then share them to the appropriate group for the section they were taken in. You should then go to the discussion area for that group, and post how many photos you’ve shared to the group, if it was all of the graves, or if there is still more work to be done (and to the best of your ability describe what areas still need to be photographed).

    At this point, if you want, you can delete the photos from your phone. Make sure, however, that the photos have been uploaded to both BillionGraves and Flickr before deleting them.

    Let’s go over this once more, in clear order:

    Before going to the cemetery:

    Join our Facebook group Okopowa St. Project to discuss the project, and share your experiences with other volunteers.

    Set up BillionGraves:

    • Set up an account on BillionGraves. If you already have an account on BillionGraves, login through this link so they know you’re involved in this project.
    • Sign up for the BillionGraves Event for this project.
    • Download the BillionGraves app for iPhone or Android.
    • Connect the BillionGraves app on your phone to your account.
    • If you use an iPhone, go to Preferences in the BillionGraves app on your phone and turn on ‘Save to Camera Roll’.

    Set up Flickr:

    • Set up a Flickr/Yahoo account.
    • Set your default license for photos to “Attribution-ShareAlike Creative Commons”.

    • Download the Flickr app for iPhone or Android.
    • Connect the Flickr app on your phone to your account.

    Select a section to photograph:

    • Look at the map above (click to zoom in) to get an idea of where the sections are in relation to the entrance, and how big they are.
    • Go to the Google Sheet and see which sections already have volunteers. Select a section that has no volunteers and add your name in the left-most volunteer cell for that section.
    • Click on the section name in the Google Sheet, or find it below, and go to the Flickr group for that section and join it. All discussion for that specific section will take place in the Flickr group.
    • In the Flickr group, post an introduction in the discussion list, and explain when you plan to photograph the section.
    • Print out a copy of the map, and circle the section you will be photographing. Make sure to bring it with you to Warsaw.

    Preparing to go to the cemetery:

    • Double-check that BillionGraves is properly configured.
    • Make sure you have enough room on your phone to fit all the photos you’re about to take. If you need to clear up your phone to make room, do so.
    • Charge your phone fully. If you have an external battery, make sure that it charged as well and bring it with you. You don’t want to be in the middle of a section and have your battery die.
    • Check the group on Flickr for your section, and see if there is any discussions you missed. Did someone already photograph that section? Is there part this is incomplete? Check before you go because you may or may not have Internet in the cemetery.
    • Bring paper and pen so you can take notes, sketch the layout of the section if you want, etc.
    • Make sure to wear pants and appropriate shoes. The cemetery is overgrown, and you don’t want to hurt yourself.

    At the cemetery:

    • When you arrive at the cemetery, make your way to your section, and figure out an appropriate path to photograph all or as many graves as you can. Take extra photos that show the paths, the lines of gravestones, whatever. You can take these photos using your standard camera app.
    • Make your way to each gravestone, and take multiple photos of each. Get one that shows the whole gravestone, and another that frames just the text on the stone. If you think you need more than one photograph of the text for it to be clear, take more than one. Don’t limit yourself. Check the back of each grave in case there is more text.

    After the cemetery:

    • Upload your photos to BillionGraves. Try to group the photos of each grave together. Skip the general photos of the area, as those are not useful for BillionGraves. Make sure all the photos fully upload to BillionGraves before leaving the app.
    • Upload all your photos to Flickr, and then Share them to the appropriate group for your section. If you photographed more than one section, make sure to upload the photos to their appropriate sections. Make sure everything fully uploads before leaving the app.
    • Post to the Flickr discussion area for your section’s group and explain how many gravestones you photographed, how many photos you uploaded, and if there is anything more for others to photograph. Do this even if you’re the only person in the group, as it will be there for future reference. You can even post immediately after taking the photos, and then follow up after you upload them (in case there’s a significant gap between those events). That will keep everyone informed as to what is going on.

    The table showing the links to the Flickr groups for each section is below. I hope if you’ve made it this far, you are considering joining this collaborative effort.

    Thank you.

    Flickr Groups for Okopowa St. Cemetery Sections
    Section 1 Section 1A Section 1L Section 2
    Section 2A Section 2B Section 2C Section 3
    Section 3A Section 4 Section 4A Section 4B
    Section 5 Section 5A Section 6 Section 7
    Section 8 Section 8A Section 9 Section 10
    Section 11 Section 12 Section 13 Section 13A
    Section 14 Section 15 Section 16 Section 16A
    Section 17 Section 18 Section 19 Section 20
    Section 21 Section 22 Section 22A Section 23
    Section 24 Section 25 Section 26 Section 27
    Section 28 Section 29 Section 30 Section 31
    Section 32 Section 33 Section 34 Section 35
    Section 36 Section 37 Section 38 Section 39
    Section 40 Section 41 Section 42 Section 43
    Section 44 Section 44A Section 44B Section 45
    Section 46 Section 47 Section 48 Section 49
    Section 50 Section 51 Section 52 Section 53
    Section 54 Section 55 Section 56 Section 57
    Section 58 Section 59 Section 60 Section 62
    Section 63 Section 64A Section 64B Section 65
    Section 66 Section 67 Section 68 Section 69
    Section 71 Section 72 Section 73 Section 73A
    Section 74 Section 75 Section 76 Section 77
    Section 78 Section 79 Section 80 Section 83
    Section 84 Section 85 Section 86 Section 87
    Section 88 Section 89 Section 90 Section 91
    Section 92 Section 93 Section 94 Section 95
    Section 96 Section 97 Section 98 Section 99
    Section 100 Section 101 Section 102 Section 103
    Section 104 Section 105 Section 106 Section 107

    For photos that are not in one of the above sections, there is a general group for this project here.

    Google PhotoScan – a genealogists best friend?

    google-photo-scan

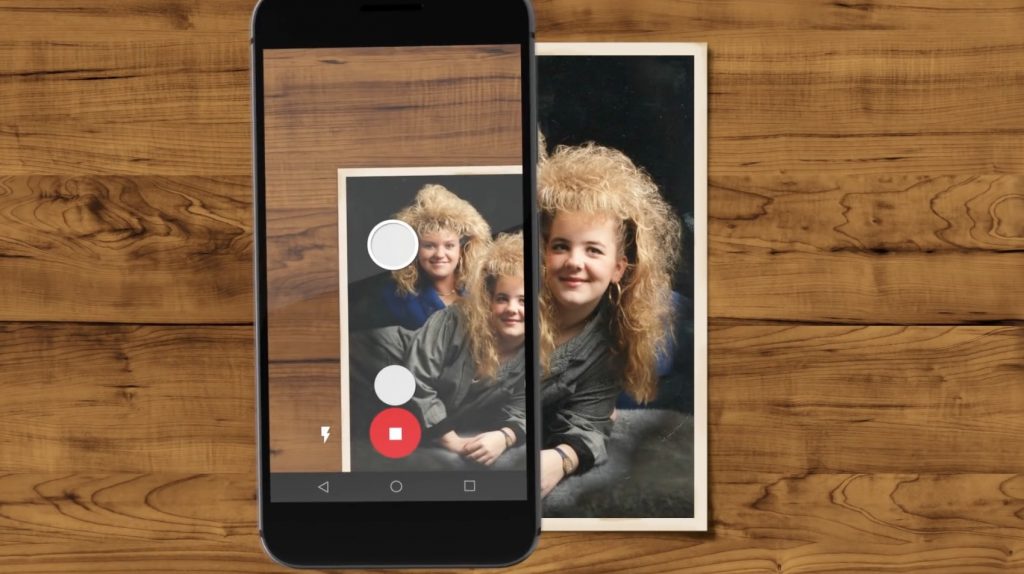
    Google has introduced a new app for both Android and iPhone for scanning printed photos. You can even photograph pictures in glass frames and it will remove the glare.

    They’ve put out an amusing video to explain how it works:

    I’ve had reservations in the past about phone-based scanning apps for genealogy purposes, especially those that try to scan more than one photo at once (such as a page of photos in an album). My primary concern was that by scanning multiple photos in a single picture, you are drastically reducing the resolution of the photos. Google PhotoScan, however, seems to go in the opposite direction, letting you take multiple photos with your phone to construct a single hi-res glare-free version of the photo you are scanning. This seems more in the right direction.

    One problem genealogists run into is finding and copying family photos. Sometimes they’re sitting in one’s attic in a box, but many times they’re sitting in someone else’s attic, or some distant cousin’s photo album. This is the kind of problem that has been addressed by products like the Flip-Pal mobile scanner in the past, although this app is probably easier to use and in many cases will probably return a better result. There are still some cases where a flatbed scanner will probably return a better result, but the advanced algorithms used by this app will be able to get better results most of the time (especially for pictures behind glass).

    I haven’t had a chance to test out the app yet, but I welcome comments by others who have, and I will add my own observations once I’ve had a chance to kick the tires.

    What DPI should I scan my photos, and in what format do I save them?

    My lecture Preserving Photographs, Scanning, and Digital Backups at this weeks’ IAJGS International Conference on Jewish Genealogy was well attended with somewhere around 150-200 people. While I can’t post the video of the presentation on my blog, I do want to share some of the information from the lecture here.

    The two most common questions I get about scanning photographs are:

    1) What DPI do I need to scan my photo?
    2) What file format should I save the file in?

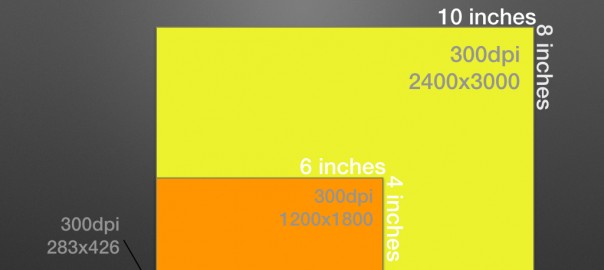
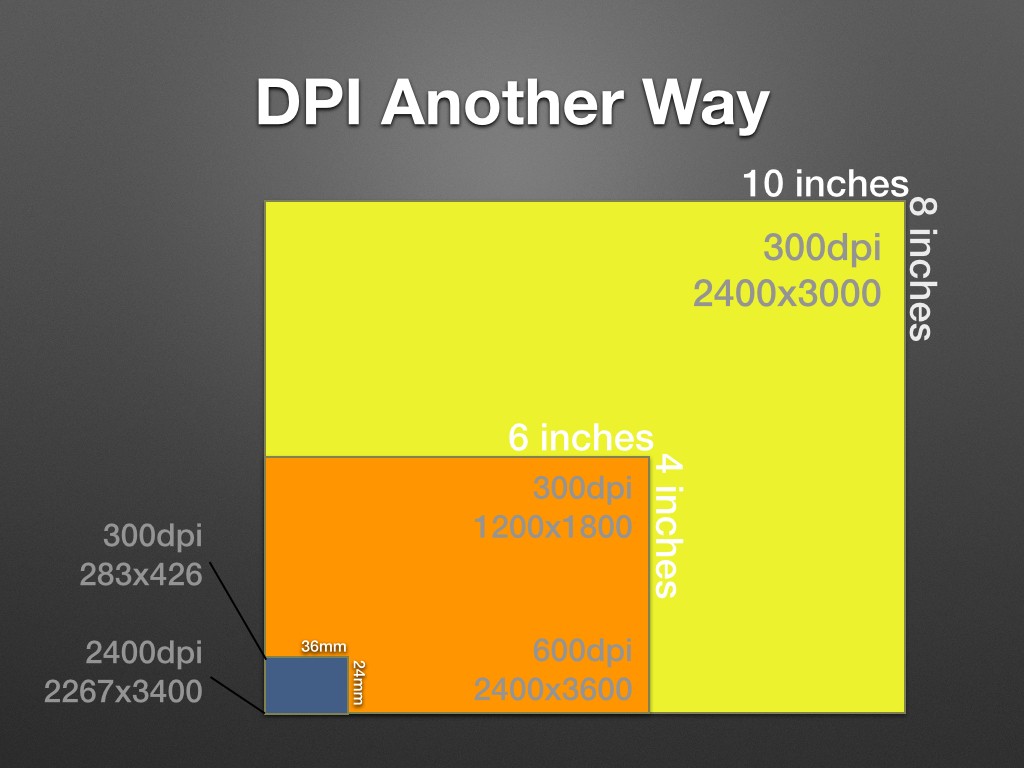
    DPI stands for dots-per-inch, and refers to how many pixels are present in each inch of the photograph. For example, if you had an 8×10 inch photograph, and you scanned it at 100dpi, you would have a photo that was 800×1000 pixels, or 800,000 pixels altogether. That’s less than a million pixels, or another to say it is it is less than a megapixel. Doubling the DPI to 200dpi, gives you 1600×2000 pixels, or 3,200,000 pixels, or 3.2 megapixels. Note that doubling the DPI effectively quadruples the number of pixels, since the dpi increases in both vertical and horizontal directions.

    Here’s another way to look at, in a slide from my presentation:

    DPIAnotherWay
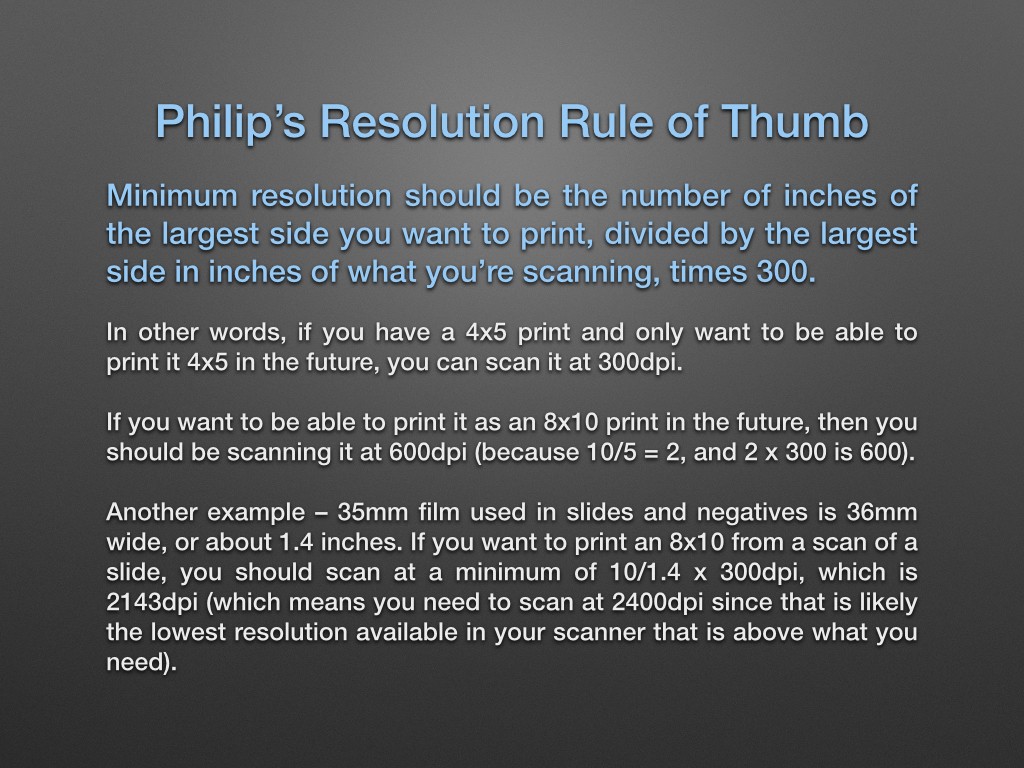
    Basically, if you look at scanning photographs (or negatives/slides) you can see that scanning it at 300dpi for different sizes will give you much different size images. I have a rule-of-thumb that I use to determine the correct DPI to scan at, and basically it has to do with figuring out the largest size you want to be able to print (printing is usually done at 300dpi) and then adjust your scanning dpi to insure you’ll have enough pixels to print. Here’s the summary:

    rule-of-thumb
    For people reading this on a small screen where the image is hard to read, the basic rule is:

    Minimum resolution (DPI) should be the number of inches of the largest side you want to print, divided by the largest side in inches of what you’re scanning, multiplied by 300.

    So if you are scanning a 4×5 print, and want to be able to print at 8×10, you need twice the DPI you’ll print at, so 600dpi. Of course, it doesn’t hurt to scan more than you need, although there are diminishing returns. Not all photographs are high enough quality to give you a better picture when scanned at very high resolution.

    A Kodachrome slide supposedly has enough resolution to output about 20 megapixels. That means you can basically max out a 4000dpi slide scanner and get a good result. That said, a small old print with lots of grain probably wouldn’t benefit by going beyond my rule of thumb, and some likely could be safely scanned at a lower resolution.

    Storage is cheap though, so I say scan as high a resolution as you want, and use my rule of thumb as the minimum guideline.

    So once you’ve figured out what resolution to scan in, what format should you save it in?

    The short answer is TIFF. TIFF was actually designed early on for the purpose of scanning photographs. TIFF also, for the most part, does not lose any data in the file format, unlike formats like JPEG which always compress data in a lossy fashion (I say for the most part because it’s technically possible to use JPEG compression in a TIFF file, but it’s rare, and I doubt any scanner software you would use is going to do that). You can scan to TIFF format using LZW compression that is lossless (i.e. does not degrade the photo quality). TIFF is also good because it is so widely supported, and is used by archives and libraries for their own scanning, and is unlikely to become unsupported by future software.

    PNG is also a good format for scanning. It’s a more modern format, and offers built-in lossless compression. It’s not as widely supported, but if space is at a premium, it might save you a bit over TIFF.

    JPEG is not a good format for scanning, because it a lossy compression format, and you will always lose some data when saving to a JPEG, even if you save it at 100% quality. I sometimes scan to both TIFF and JPEG, as JPEG can be easier to share sometimes, but I am sure to have the TIFF file as well.

    PDF is not a good format to scan photographs with, as you have no control over how images are compressed, and editing them is much more difficult than TIFF or PNG. In general, PDF files will actually use JPEG compression anyways, without being able to even set the quality. If you’re scanning a multi-page printed document, you can use PDF as a convenient way of sharing it, but if there are photos and other important content in the document, I would suggest scanning it as a TIFF as well. It’s not well known, but TIFF also supports multi-page documents, just like PDF.

    If you have additional questions about scanning photographs, please post them in the comments below.

    Scanning documents and photos using your phone

    As the cameras built-in to cell phones get better and better (and indeed every year the improvement has been significant), more and more people are using their phones instead of dedicated scanners for duplicating documents and photographs.

    There are many iPhone apps for scanning documents, such as CamScanner Pro, Doc Scan Pro, Genius Scan+, JetScanner, Prizmo, Scanner Pro, TurboScan, and the genealogy-focused Shoebox (now owned by Ancestry.com).

    Android also has their share of apps, like CamScanner, Document Scanner, Droid Scan Pro PDF, Handy Scanner Pro, Mobile Doc Scanner, and there’s also an Android version of Shoebox.

    Other popular apps like Evernote are also suitable for this kind of document and photo scanning.
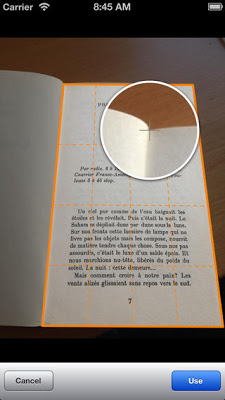
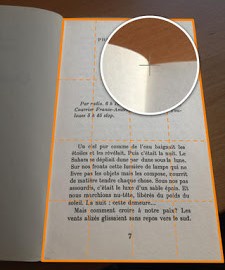
    Perspective correction in Genius Scan+

    Most if not all of these apps do something pretty neat, which is that they will take your document or photo and if the corners are not 90 degrees, it will correct the perspective. This is necessary because most people holding a camera in their hand cannot possibly get the camera lens to be perfectly parallel to the document or photo they are photographing. This causes the photo they take to be skewed (where for example one side of the photo is smaller than the other side), and thus the need for this correction technology.

    The problem with this technology is that you can never correct something like this without losing some quality. Wouldn’t it be better if you could insure your phone was parallel to the document when you take the photograph? When people traditionally took photographs of documents, they used big bulky copy stands. They are generally bulky and expensive. So what solution exists for your cell phone? Turns out this is a problem several people have taken a look at, and there are some very interesting solutions.

    ScanDock

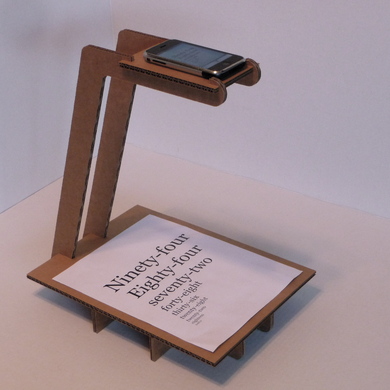
    Let’s start out with free. Designer Kyle Koch has designed a cardboard stand he calls the iPhone Document Scanner, which he provides the plans for in EPS format. You can print out the designs and cut these out using cardboard or other materials yourself.
    ScanDock

    If you want to order it pre-made, it’s also available from Ponoko in either corrugated cardboard or MDF. A newer version, called the ScanDock (maybe soon to be ScanDeck as there is another ScanDock – see below), is available only in cardboard, and the plans are not available for free. Oddly, the different products all have different and bizarre shipping options. The best option seems to be the ScanDock which costs $25 and can be shipped to the contiguous US for $8.50. If you’re in New Zealand, shipping is only $3. I think this is really just a good do-it-yourself solution, I’m not sure I would pay for this over the options that follow.

    Steady Stand

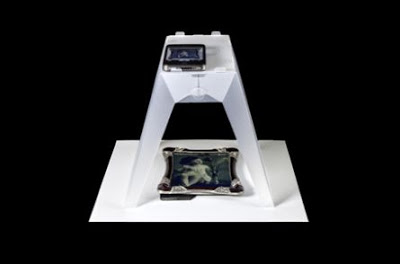
    Another option is a series of stands from Scottish photo accessory company Modahaus, which they call Steady Stands. These stands are manufactured out of plastic, and are design to diffuse the light that hits the document or object inside the stand, which helps eliminate harsh shadows.
    Steady Stand 200

    The Steady Stand comes in a variety of sizes, and can be used to photograph physical objects, or used to create videos by dragging the whole stand over an object or document (such as a map) to create steady videos. I could see using the smaller one as a kind of Flip Pal replacement. The downside is that the FlipPal doesn’t need lighting, the plus side being that you don’t need to bring a full scanner with you, and the object you’re scanning doesn’t need to be flat. The smallest stand is £15 (yes, that’s British Pounds – currently about $23.37) and the largest is £31.20 (currently about $48.62)

    ScanJig

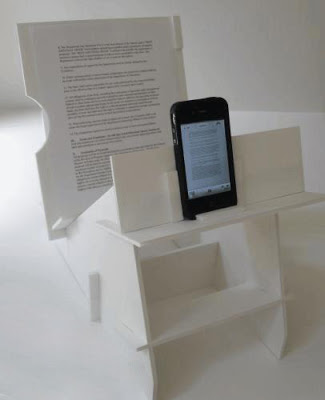
    The only solution I’ve seen that doesn’t shoot straight down onto a flat document, is the ScanJig. The ScanJig is also unique in that is designed to work with a larger variety of devices, from iPhones up to iPad Minis. There is a separate version for the Galaxy III and IV phones as well.
    ScanJig

    This is perhaps the most complicated stand in terms of setup. I’m not sure sure this is something I’d want to carry around with me. For some types of documents and workflows, this might be a good solution. I image if it’s on your desk and you’re copying lots of sheets of paper, this might be easier to swap out pages quickly. The ScanJig is currently $29.95 (although it says it is regularly $39.95) plus shipping (which was $4.95 to Boston).

    StandScan

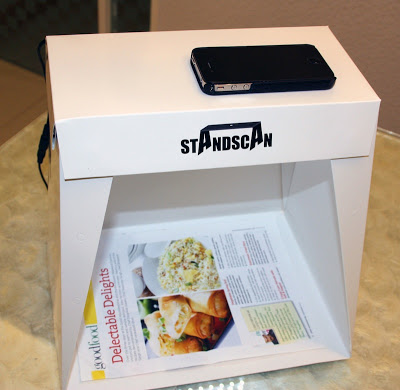
    One of the most interesting solutions is called the StandScan. It has two features that I really like – it folds flat, and it has the option to add LED lighting. Of course, due to its design that has opaque walls on three sides, it’s possible the LED lighting would be required to get good quality in many lighting situations, so maybe it’s not an option after all, but a requirement.
    StandScan

    You can get the StandScan with or without the LED lighting, and there are two options for powering the lights, 9V (1 9V battery) or 12V (8 AA batteries). The stand without lighting is $19.95, the stand with lighting and a 9V battery pack is $29.95, and the scanner with lighting, both battery packs and an AC adapter is $37.95. Shipping seems to be $15, whether to the US or it seems anywhere in the world (and by that I mean I check how much it cost to ship to Israel).

    Scandock

    One other option is Scandock, which is built like a more traditional copy stand, with built-in lights on overheard arms, and a weighted base. It has its own camera app, which uses color patches on the stand itself to insure proper color calibration, and the stand has a silicon cover for documents to insure they lay flat.
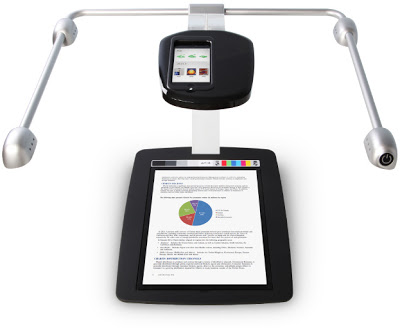
    Scandock

    In short, the Scandock is much more advanced than the offerings above, but is also priced accordingly, which the cheapest version costing $279. Also, it’s not exactly a portable solution.

    Lomography Smartphone Scanner

    If everything so far seems more or less the same, you won’t get this one confused with the others. That’s because this product is not for scanning documents, but for scanning photo negatives and slides. It’s from analog photography company Lomography, and it’s called the Smartphone Scanner.
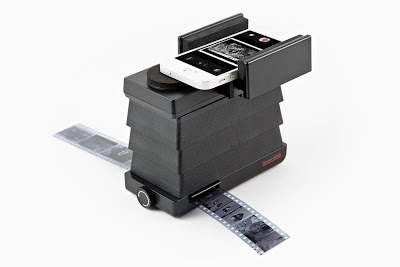
    Smartphone Scanner

    This device has a light source on the bottom, and you put in a transparency and scan it using your phone. It supports all iPhones and several Android devices. It has its own iPhone app, although you don’t need to use it (it is, however, helpful if the app you’re using can reverse the colors of image it captures).

    The price is $59 in the US, and €59 in Europe, plus shipping. It’s also available for $59 (including shipping in the US) from photojojo, one of my favorite photo gadget companies.

    Interestingly, two other phone stands were crowdfunded on Kickstarter, and succeeded in being shipped out (not as common as you might think with hardware products), but both seem to have disappeared – ScanBox and Scandy. The team behind ScanBox seems to have moved onto other products (LED light bulbs), while Scandy’s web site has disappeared completely.

    I haven’t used any of these solutions unfortunately, but if one of the companies wants to send me a stand, I’m happy to review it on the blog.

    Have you used any of these products? What software do you use for document scanning with your phone? Share your experiences in the comments.