I’ve had a lot to write since visiting the Okopowa St. Jewish Cemetery a few weeks ago, but have too busy to put it all together. After my first visit hours after arriving in Poland that Sunday, I wrote my initial thoughts in Practical suggestions when photographing cemeteries. I visited a second time a few days later on Wednesday and I wanted to share my thoughts on that visit, and what I’ve had time to think about since returning from Poland.
GPS Mapping
The first thing I wanted to discuss is the idea of using GPS to help map the sections of a cemetery. While the Okopowa St. Cemetery has several maps, once you’re on site, they’re only useful in a general sense. It would be amazing if there could be an app that would show you which section you were in on a moving map. In my earlier post I showed an overlap on a satellite image of where I walked on the first day, which was densely packed in Section 1, and then a walkabout around the cemetery.
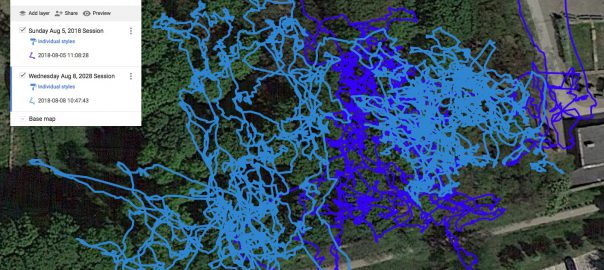
On the second visit, I photographed more of Section 1, which you can see in this new map:

The original path from Sunday is shown in dark blue, and the second path from Wednesday is in light blue. This is a close up showing just the part of Section 1 I visited. There is overlap, and you can see I photographed gravestones to the right of the original area, as well as to the left. All of this is still Section 1 in the cemetery.
In cemeteries with clear sections and straight walkways between sections, perhaps you could generate a map by walking the walkways and overlaying that onto a map like above. In this case, where the paths are not always clear, creating paths when in specific sections can help define the area of the section. To make these paths I used an app on my iPhone called MyTracks, although there are many GPS Logging apps that can generate similar data. Generally these apps create a GPX file, which can then be uploaded to Google Maps or other services and shown as above.
Maps on BillionGraves
Once uploading the images to BillionGraves, you can also see a similar map on their site, showing where you took photographs. Here’s a look at my uploads to the site:
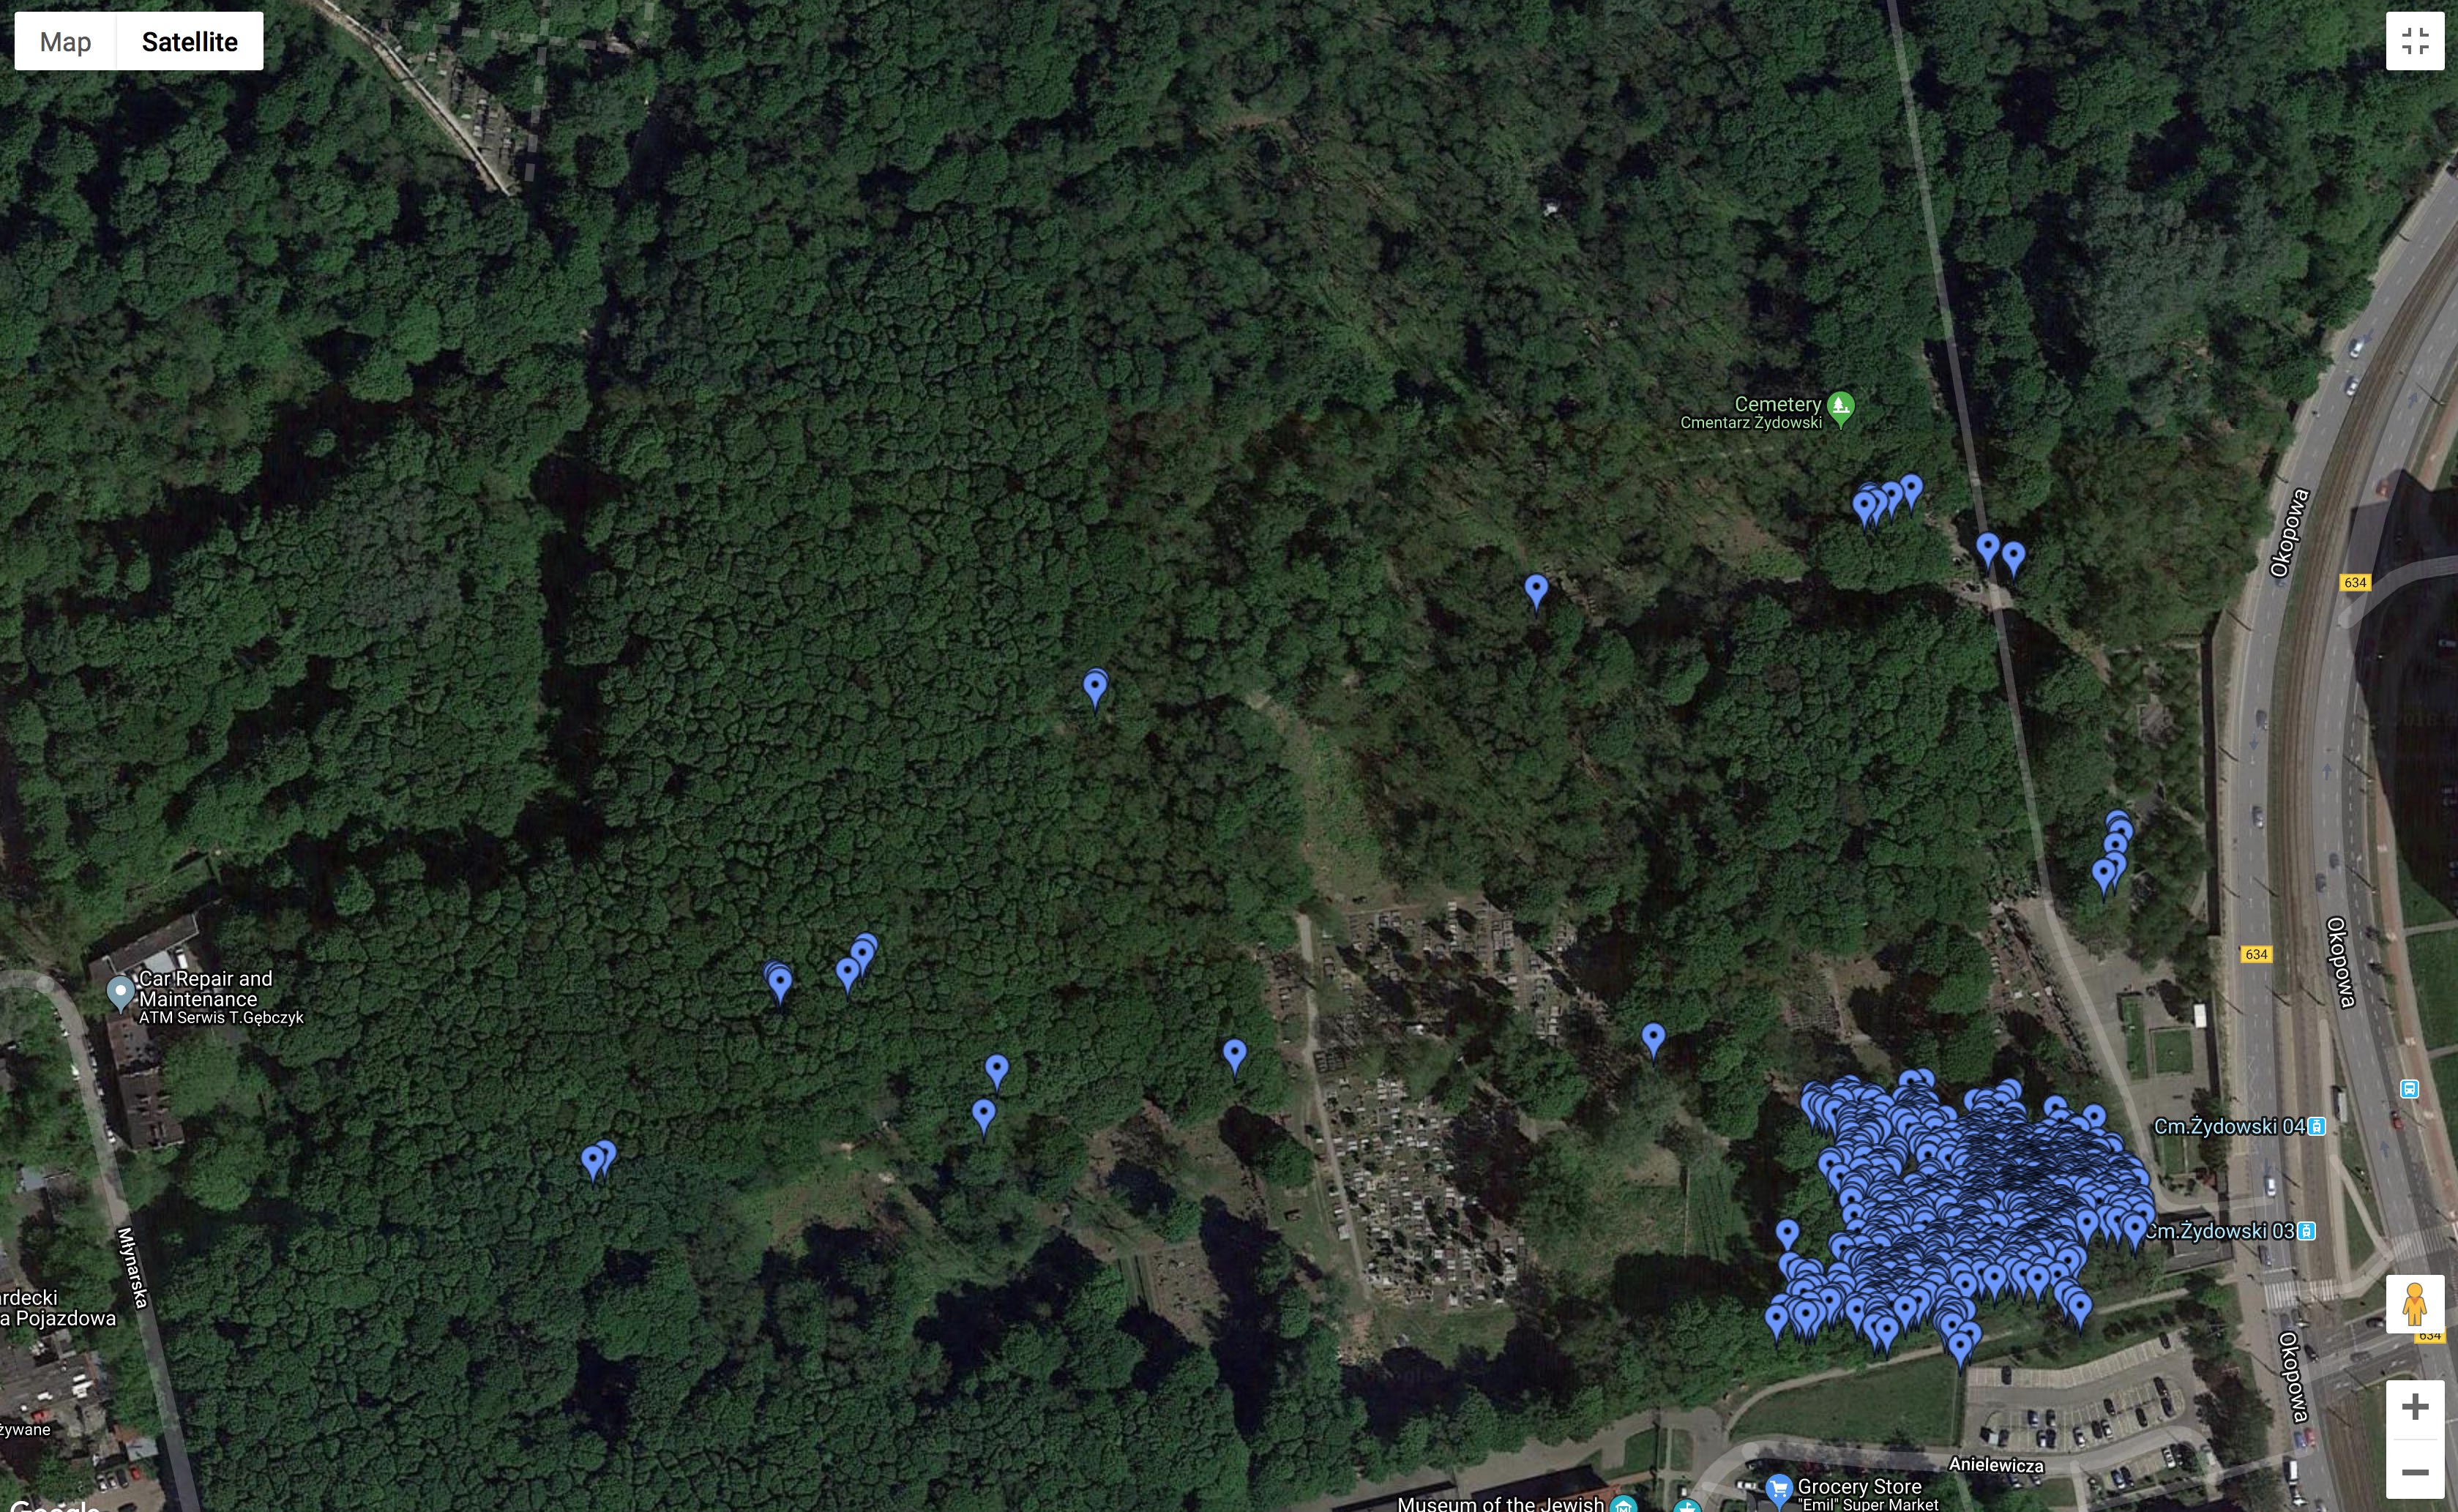
In the above photo you can see the photos I took while walking around the cemetery on my first visit, and you can see Section 1 where I took most of the photos in the bottom right.
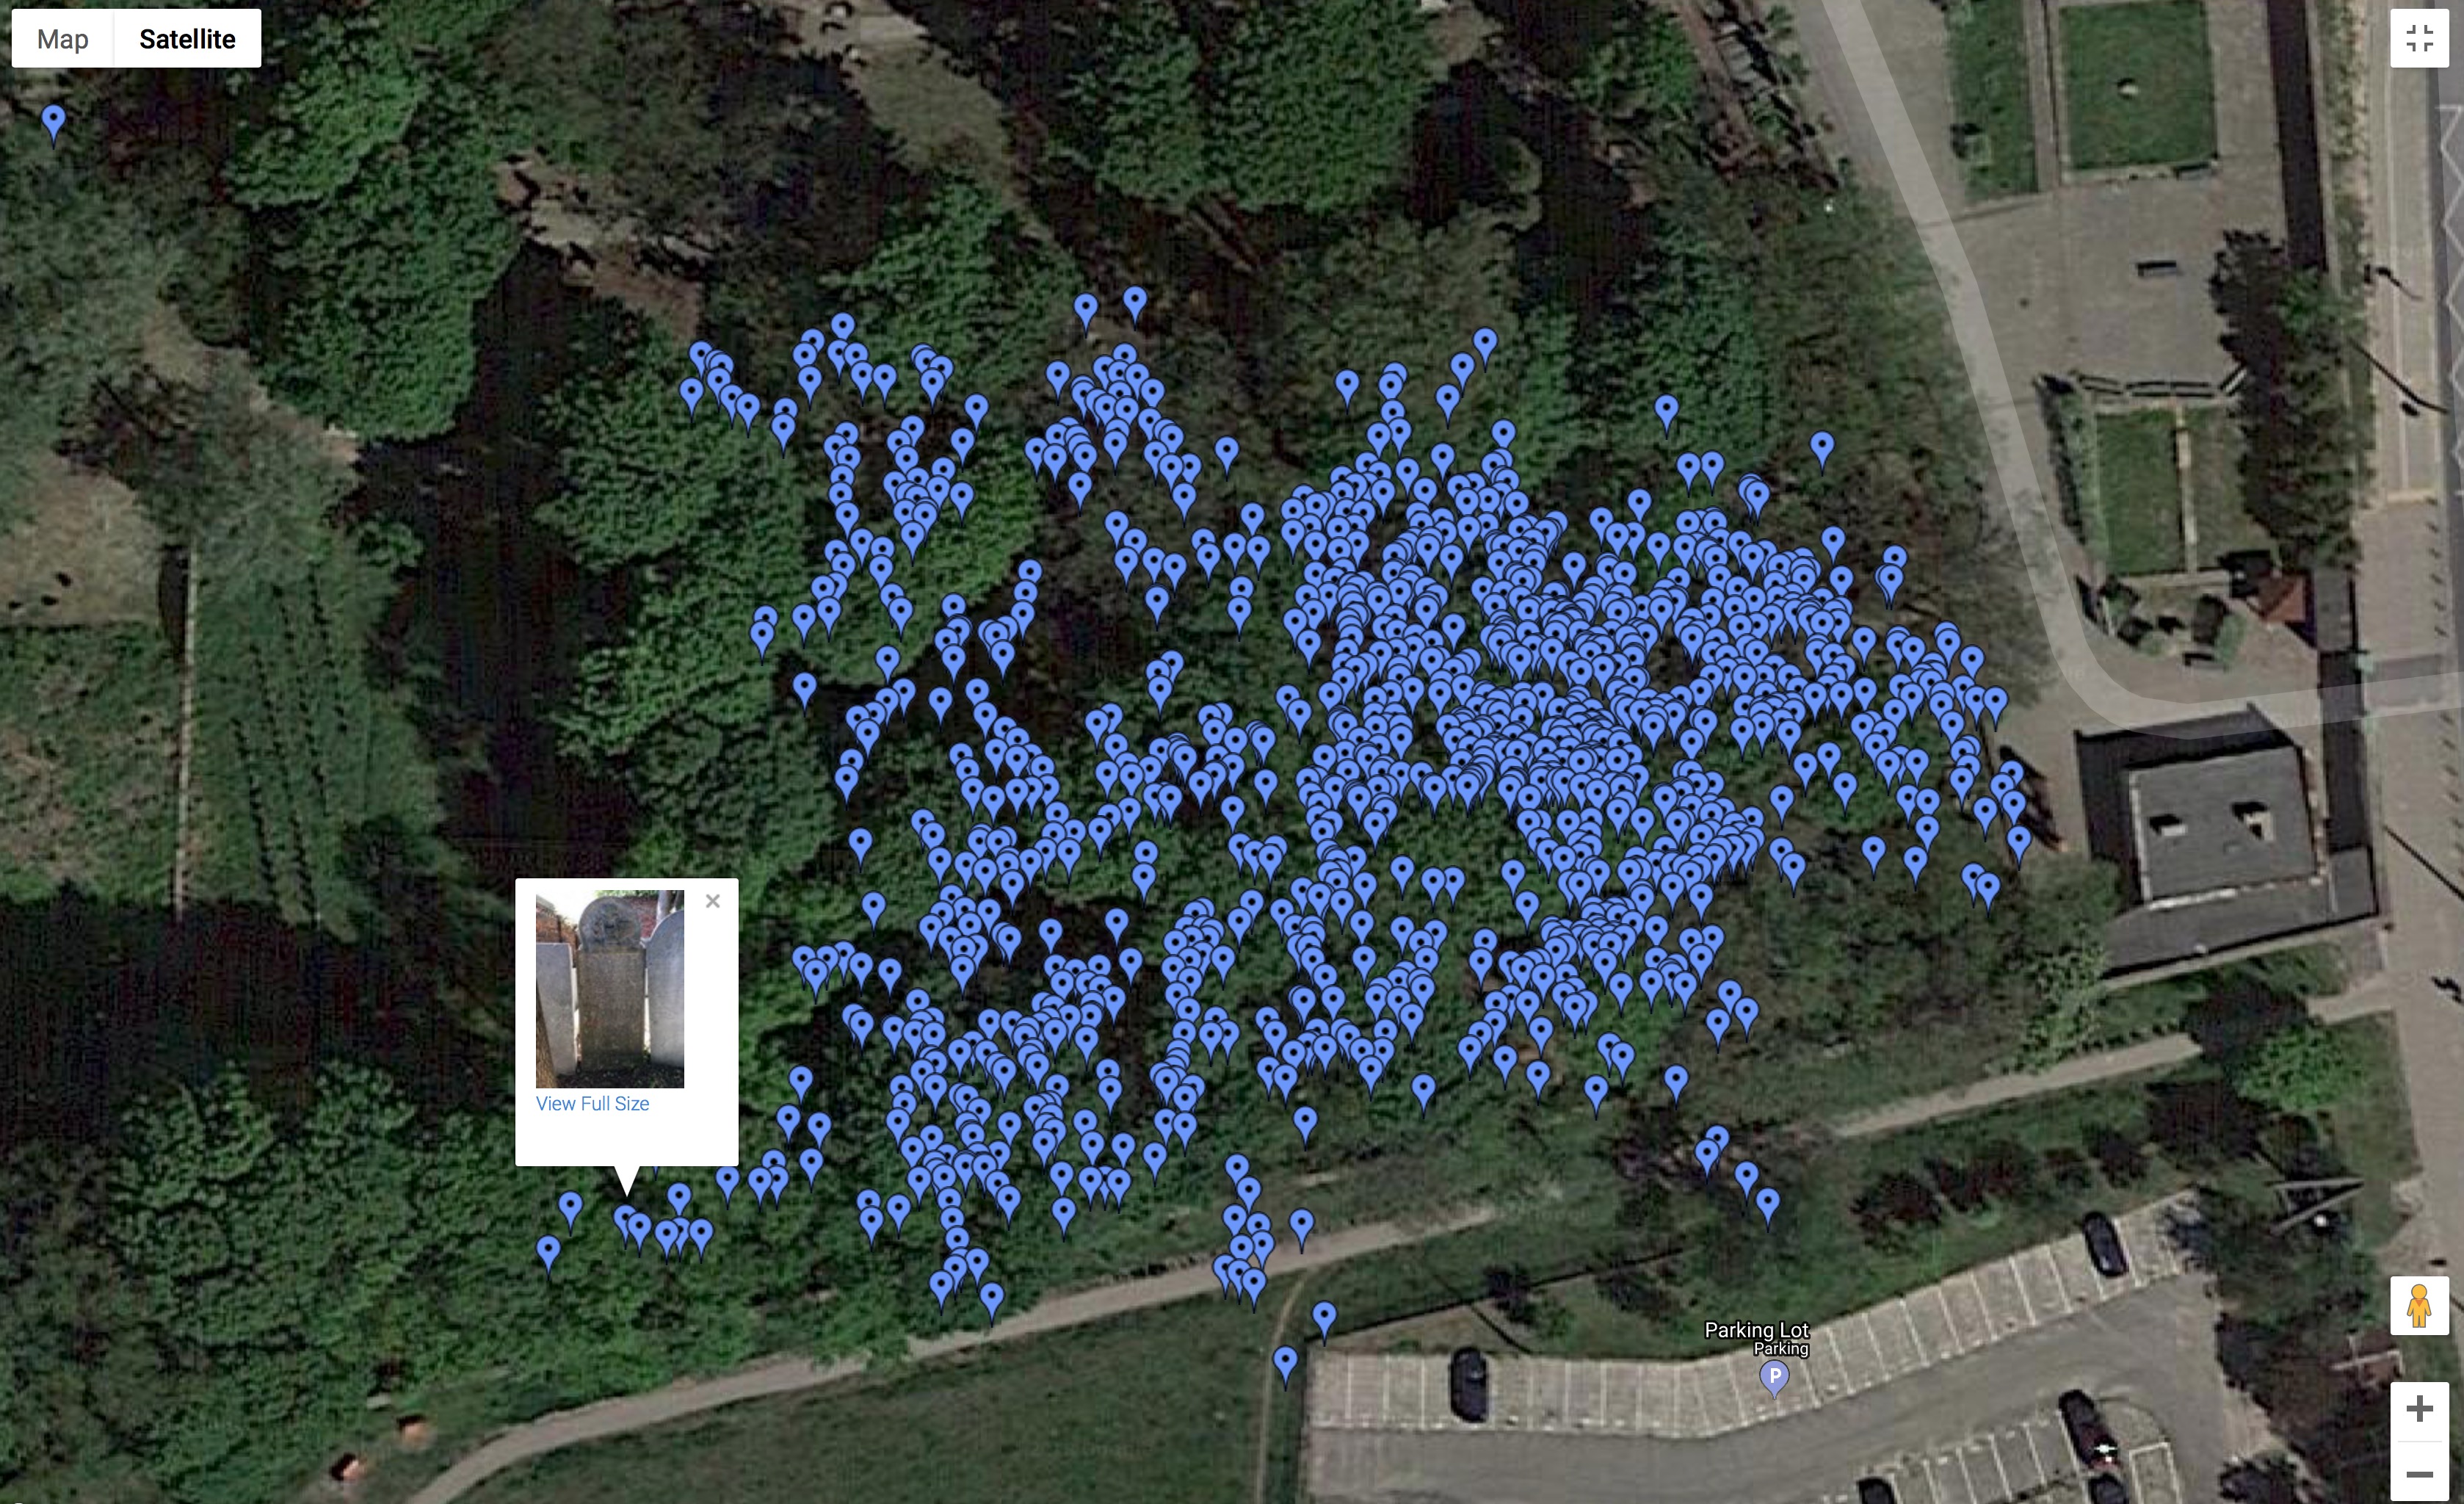
Here’s a view closer up, which shows that you can actually click on a marker to see what photo is located there:
Transcribing on BillionGraves
Clicking on the highlighted photo brings up the transcription interface:
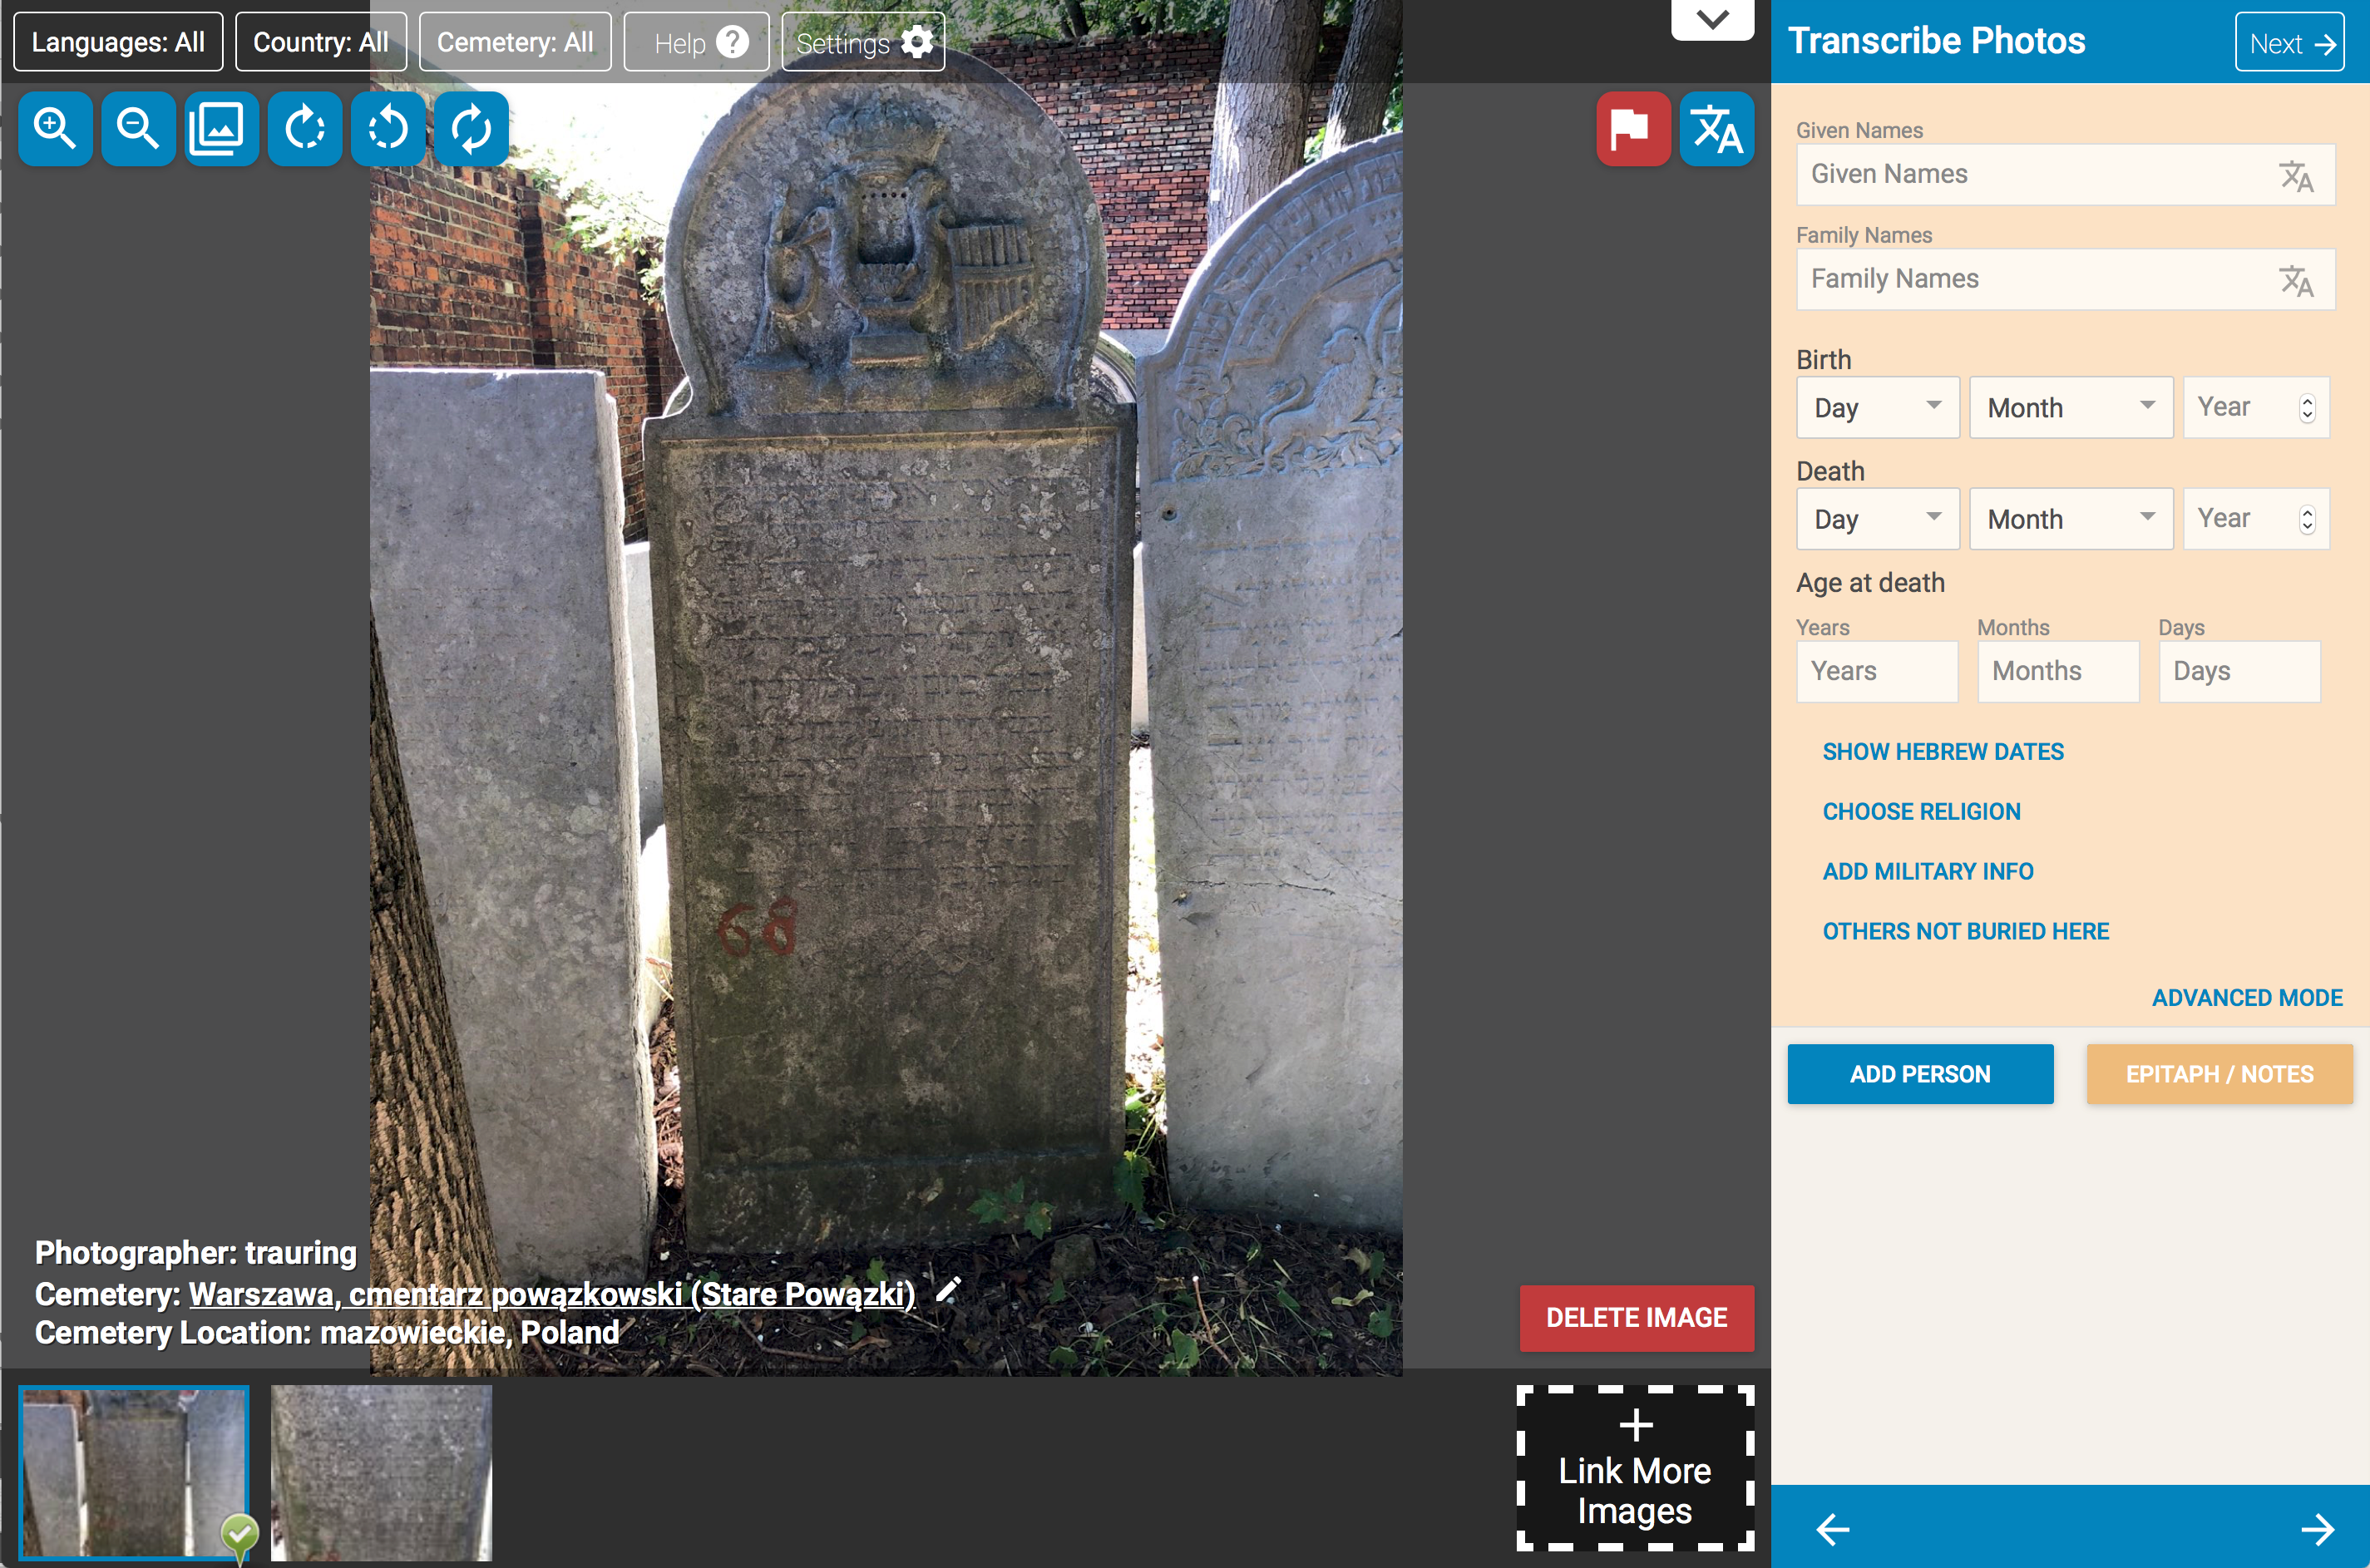
There are a few interesting things to point out about this interface. First, notice that on the right side where you add the information on the person, there is an option to ‘Show Hebrew Dates’ which when clicked allows you to add Hebrew dates for both birth and death. A nice feature for Jewish cemeteries.
On the bottom left you should notice that there are actually two photographs of this gravestone. The first one, which is being displayed in the main window, is the wider shot showing the whole gravestone. The second photo is a close-up of the text only, which is probably the better one to use when trying to transcribe the text. This second photo was associated with the first one when I was photographing the gravestones by using the linking feature in the BillionGraves app.
There’s one bad thing to point out as well, unfortunately, which is that if you look at the cemetery listed for the gravestone right above the photo thumbnails on the bottom right, it’s actually the wrong cemetery. I had a lot of trouble when using the app to keep it set to the correct cemetery. It turns out there are 5 cemeteries in close proximity, and the user interface allows one to switch too easily, which is a design error in my opinion. I’m still not clear how the app switched so many times back and forth between two cemeteries, but I think it is related to the times I would exit the app to look at something else on my phone, and then return to the app. When returning to the app I think it sometimes switched to the closest cemetery according to your proximity to the center of the cemetery. In any case, almost half of my photos were placed in the wrong cemetery, even though they’re clearly all clustered together in one place. I’ve spoke to someone at BillionGraves, and they were able to fix this on their end quickly (after I took this screenshot). Hopefully they will also fix the app to make it harder to switch cemeteries so easily, so other people don’t have this problem in the future. If you’re using the app, make sure to check after you’re done which cemeteries it says you uploaded to, and make sure there are no cemeteries you didn’t visit.
One of the nice features in their interface are the buttons on the upper left that let you flip, rotate, and apply filters to the image. It’s nice to be able to do those things if you need it.
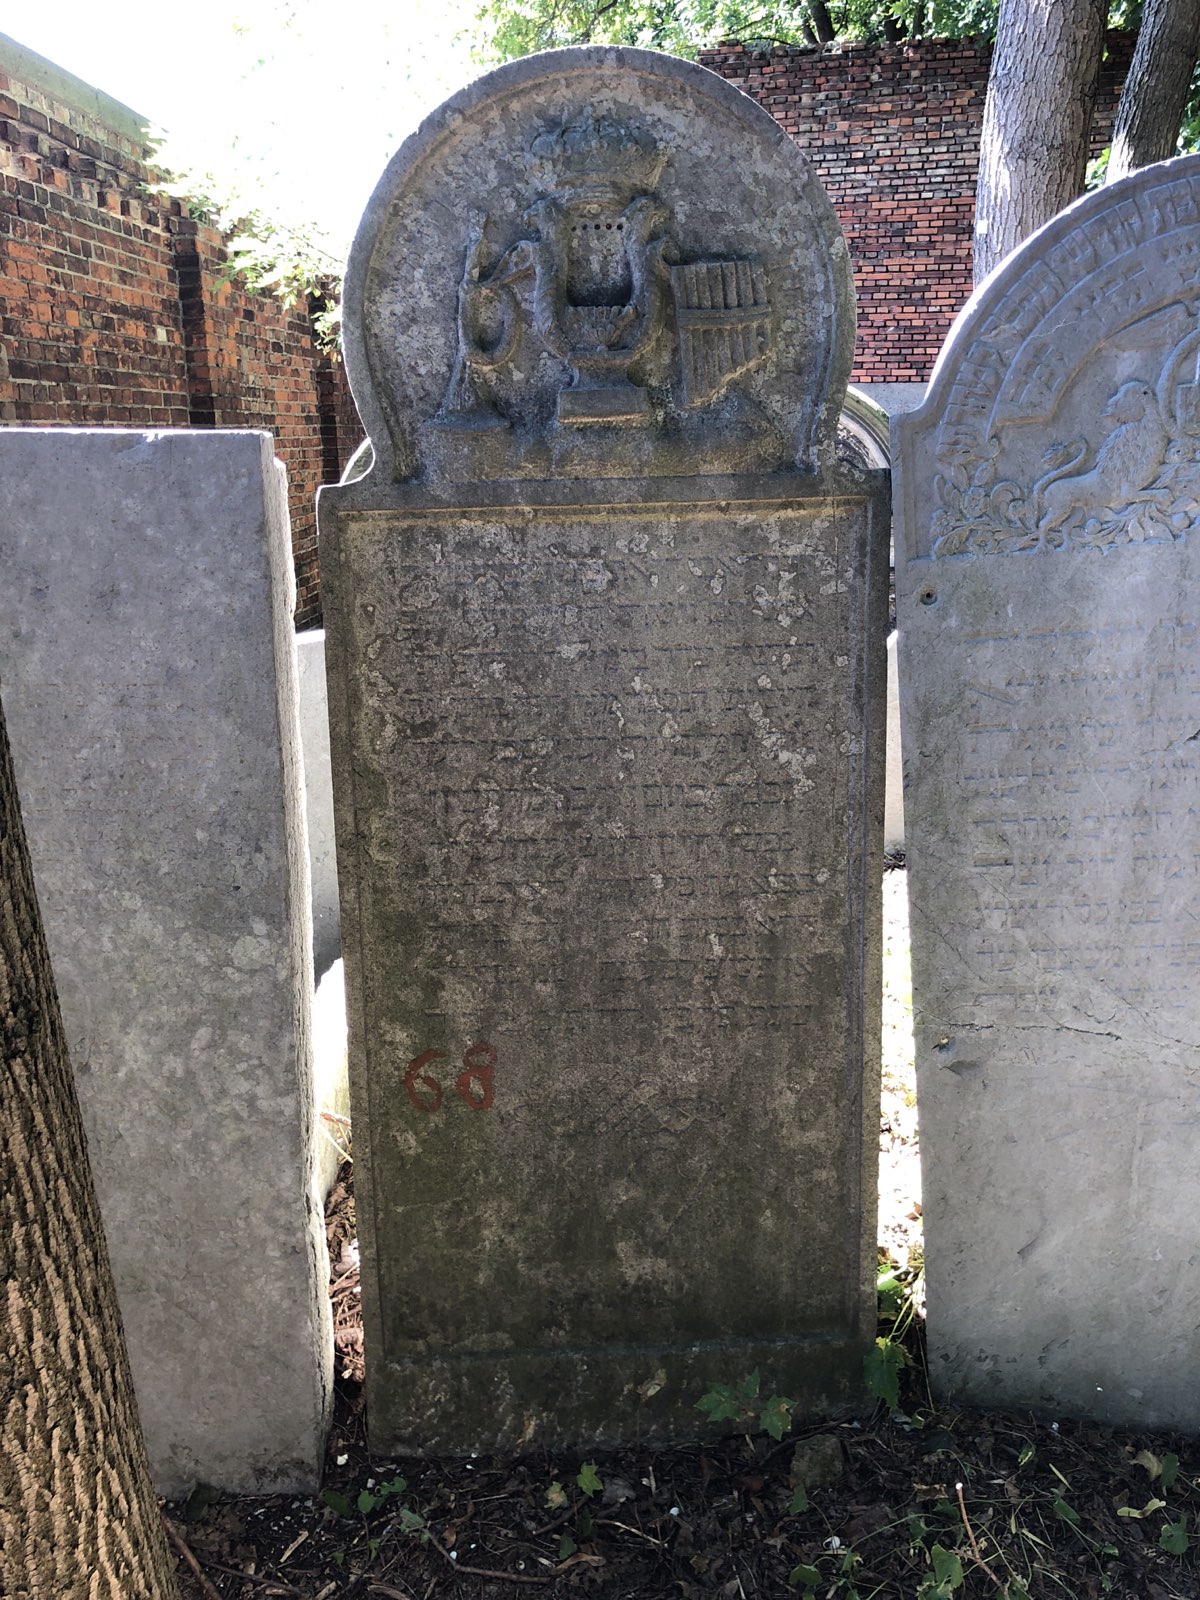
Eagle-eyed readers of my blog might have noticed that the engraving on the top of this grave has been on my blog before. A black and white photo I took of it shows up as number 8 in my article on Jewish Gravestone Symbols. That picture was taken 25 years ago when I first visited the Okopowa St. Cemetery.
Image Quality
I also want to take a look at the quality of photographs that end up on the site. By default BillionGraves cuts the size of the photograph uploaded to their site to 1200×1600 pixels. The camera on my phone takes pictures that are 3024×4032 pixels. That means about 10 million pixels are lost in the upload. Here are three photos of the above gravestone. The first one (on the left) is one I took with my phone’s built-in camera software, the second (in the center) is the photo that BillionGrave saved to my camera roll, and the third one (on the right) is the photo that was uploaded to the BillionGraves web site.
| iPhone Camera App | BillionGraves Saved | BillionGraves Web |
|---|---|---|

|

|
|
Looking at them in the above table the right two should basically look identical. The reason they look slightly different from the one on the left (if you look closely they look a bit darker) is that BillionGraves modifies the image before saving it. They probably sharpen the image, and possibly they increase contrast as well. Once they modify the image, they save it to the camera roll (if you have that option set on the iPhone) and then they then shrink it down to 1200×1600 pixels and upload the smaller image to their web site. The truth is that looking here, you probably don’t notice that much of a difference, and that’s because at the end of the day, these images came from the same camera in the same phone.
Another difference between the image from the phone’s camera app and the one saved by BillionGraves is that the directly photographed image on the left has much more meta data, most importantly the GPS coordinates associated with the photo. BillionGraves uploads the GPS coordinates, but does not embed the data in the photo itself. Therefore, if one wanted to be able to use the GPS data on multiple sites, they would need to take the photos in another application, and then figure out a way to get them onto BillionGraves and other sites. Unfortunately, I don’t think BG allows you to upload photos that don’t originate from their app, at least not as gravestone photos with GPS (they allow them only as general photos of the cemetery). I need to do more research on this, but it seems it would be a good idea to allow photos from a GPS-enabled camera to be uploaded, even if it’s not from their app. This would allow taking pictures with better cameras than are possible in cell phones, and the use of more advanced lighting, such as an external flash held from the side which might bring out the lettering on some gravestones. How one would link multiple photos is a different problem. I suppose they could offer a way to upload all the images, and then link them as necessary before creating gravestone profiles for them.
Uploading to Flickr
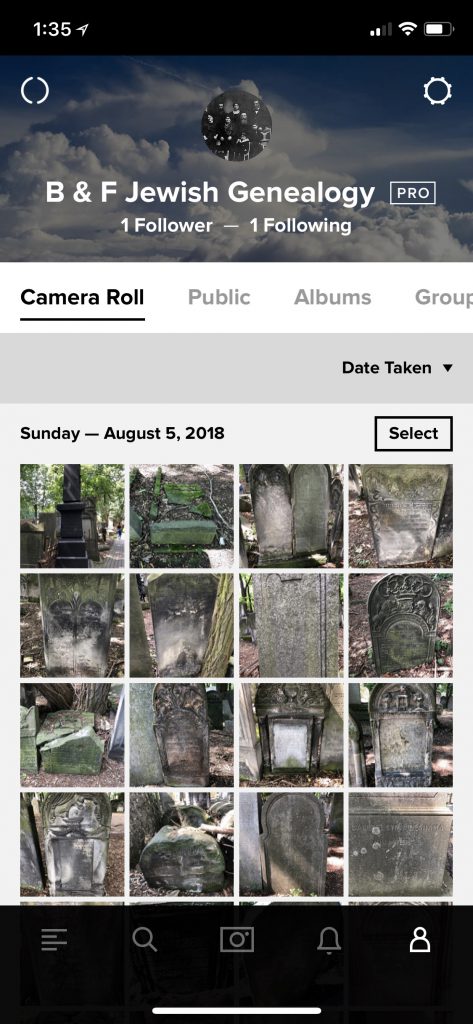
The next step was the upload the full resolution images to Flickr. I decided to do this directly through the Flickr app on my iPhone, and ran into some issues. I selected the first 443 images from August 5, and started the upload, except there was nothing to show me it was uploading. I navigated to different parts of the app until I finally found the Profile page, which showed an animation in the corner indicating that files were being uploaded. Clicking on that animation showed me the progress:
 |
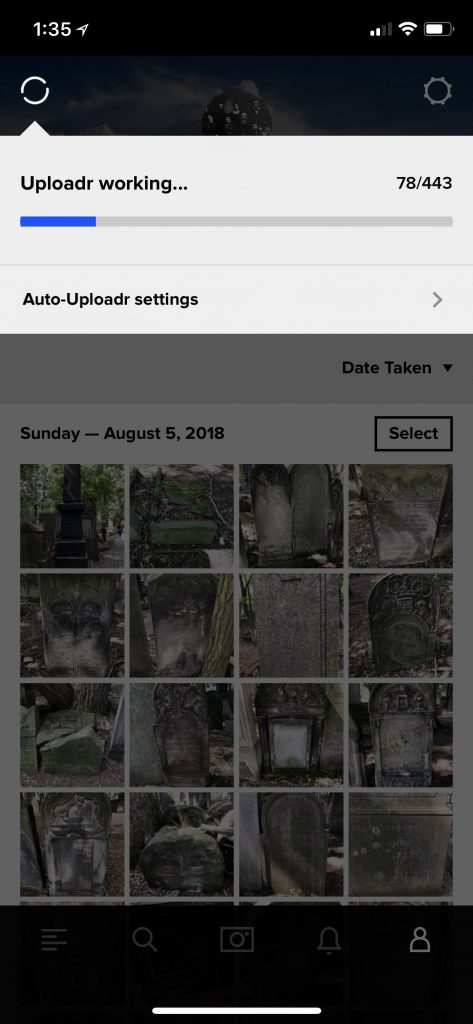 |
One problem I ran into when uploading is that it took a very long time. When you’re uploading from your phone, waiting up upload hundreds of high-resolution is not really possible. Clearly this is why BillionGraves shrinks the images before uploading them. It’s also possible that Flickr doesn’t have the bandwidth to upload these files so quickly. Considering how many photos are uploaded to Flickr every day, it could be that they purposely keep a cap on upload speeds so their servers don’t get overwhelmed. Even leaving the phone to upload overnight didn’t work as it seems once the phone turns off its screen it also turns off uploading. This probably has to do with whether or not Flickr uploads in the background. Flickr has a page suggesting things you can do if you are having trouble uploading, but none of these suggestions helped in my case.
In the end I think there are several big problems with doing things the way I originally proposed. BillionGraves strips out the GPS data from the photos (or more accurately never adds it) it saves, and it also modifies the images before saving them. Flickr is difficult to upload to from a phone, so it’s probably best to transfer the photos to a computer and then upload them.
3D Scanning – the future?
One thing learned while taking over a thousand photos in the Okopowa St. Cemetery is that not every gravestone can be read from a normal photograph, and some not even from standing right in front of the gravestone. Lighting conditions also sometimes make it more difficult to read the text from the photographs. Certainly some gravestones have been worn down so much over the years that nothing is left to read, but some of them may have faint engravings that while difficult or impossible to read visually, might be able to be read using new technology. One possible technology is 3D Scanning. This is actually a collection of different technologies, that use different techniques to analyze the depth of surfaces. These techniques include laser triangulation, photogrammetry, structured light, and time-of-flight. The specifics of these techniques are not really relevant, but suffice it to say that some are more practical to use in a cemetery. Many 3D scanners won’t even effectively work outside, either because they are not portable enough, or because they require a studio setting with consistent lighting.
While it’s possible to fund some number of professional 3D scanners that can start about $5000 (such as the Shining 3D Einscan Pro+) for large cemetery projects, we need to test the capabilities of smaller and less expensive sensors to see if they work for this application. The first consumer 3D camera was the original Microsoft Xbox Kinect camera, which was launched in 2010 (and required connection to an XBox console).
The Kinect camera was based on technology from Israeli company PrimeSense. PrimeSense technology would show up in other 3D products, including the Kickstarter-funded Structure Sensor, which mounts to the back of an iPad to allow you to scan objects in 3D using the iPad as the interface. The Structure Sensor costs $379, not including the iPad you need to operate it. That’s getting closer to something that could be widely deployed in a cemetery project, but there’s some evidence that the Structure Sensor will be largely obsolete soon.
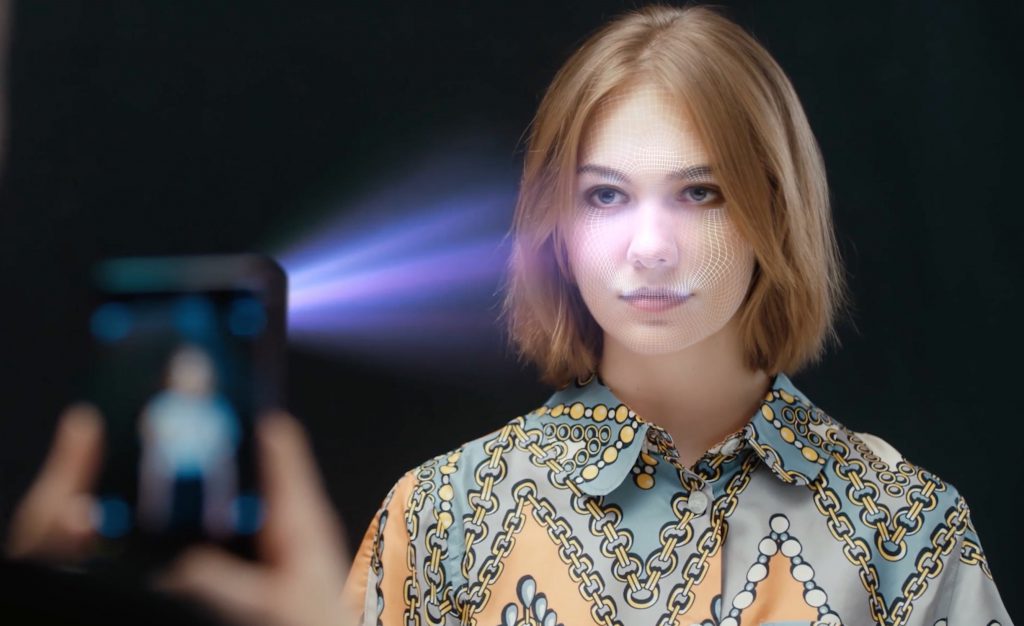
Last year Apple introduced face recognition to their iPhone X that uses a structured light sensor. The phone projects 30,000 dots in a specific pattern from an infrared projector on the front of the camera, and then uses variances in where it detects the dots to build a 3D map of the user’s face. Interestingly, Apple’s technology most likely comes from its acquisition of PrimeSense in 2014. A user used an infrared camera to photograph what the dot pattern being projected from the iPhone X looks like, and posted in online:

The above photo helps illustrate how the structured light sensor in the iPhone works. Apple has opened this 3D sensor to developers, who have started developing applications that can use it to do 3D scans. One problem is that the sensor is on the same side as the screen, which is great for doing a scan of your face, but not so convenient for scanning other objects where seeing what you’re scanning would help. Apps exist already, however, which use the technology in the phone to do scans. Is it good enough to pull out the narrow worn-down inscription on a gravestone? We’ll need to do some testing to see what it can do. The good news here is that the technology is in a device that many people are already carrying with them everyday.
While Apple’s implementation is the most sophisticated 3D sensor deployed in a cell phone, other companies are not sitting still. Some companies have announced similar technologies with ten times the dots as projected from the iPhone X. More dots should in theory mean more resolution, which is better. One interesting phone that was announced in the past few weeks is the Oppo R17 Pro, which features a 3D sensor that is, significantly, positioned on the rear of the camera. By having the sensor on the rear, that means you could have applications that can use the 3D sensor to capture depth information while at the same time using the screen to monitor the progress of your scanning. Their intention is to make for better portrait photographs, but the fact that there is a use for the technology on the back of the phone means we could be seeing many more phones with this technology built in.
While the Oppo brand is not well-known outside of China, it is significantly from the same company that makes the popular OnePlus phones, and the Oppo R17 Pro is expected to be the basis of the forthcoming OnePlus 6T phone, which will probably have the same 3D sensor on the rear of the phone and will be out in a couple of months. These phones use a technique called time-of-flight and I don’t know how accurate it is compared to structured-light, but once the technology is out there on mainstream phones, I’m sure there will be apps made available to test them fairly quickly. Apple is predicted to offer something similar in its phones next year, which should help expand the market for apps that utilize rear 3D sensors.
Will the genealogy community need to develop their own scanner application?
These sensors were designed for improving portraits, enabling augmented reality applications, as well as security applications, and certainly none of their designers had cemetery photography in mind when developing them. Utilizing these sensors for improving cemetery photography and enabling the reading of currently non-readable inscriptions, may require some custom development on the community’s part. An app that could take multiple connected photos, attach GPS data, utilize 3D sensors to scan engravings on stones, and then upload the results to any number of sites including BillionGraves, FindAGrave, JOWBR, Flickr, etc. could be a great tool for the genealogy community. The same app could integrate document and photo scanning to make it an all-around genealogy tool.
There’s a lot to digest in this post, and I hope I’ve explained everything well. Please share your thoughts below in the comments.
my ggrandmother buried in warshaw necha silber sector 57/12/#33 d-1921 how can i found if her husband naftali tzvi is buried there ty
What else do you know about her husband? Do you know when he died? Do you know the name of his father?
his fathers name i don’t know brother was the famous philanthropist sender silber from lublin who owned a wiskey factory he died probably around 1905-10 thanks ,
he was from zelichov
There’s a Henryk (Tzvi Naftali) Silber Margoliot, son of Sender, which died in 1905 and is buried in Section 51, Row 34, Number 35. That doesn’t look exactly right, but there may a connection. The annotation on the record say he was a descendant of Rashi.
he is a relative i don’t know exactly my ggrandfather the son of naftali tzvi(HERSHEL)went by the name silber/margolius d-1940 lublin thanks let’s keep on trying
Is there a way to request a specific headstone photo? Ihave a photo of my gggm’s grave but it is from the side and difficult to read…..I am hoping I can find someone to take a more direct photo…..she is in Sect 53, Row 21 and #11. Doba Hirshfikiel Koerner is her name. She died in 1918.