I’ve written a couple of articles in the past about using Hebrew on your computer, specifically Finding Hebrew Fonts and the more niche Trick to use Hebrew and Yiddish in Adobe InDesign. Although using Hebrew on one’s computer is fairly simple, one thing that is not so simple is adding Hebrew nikud (vowels) to your text. In Hebrew, unlike in English, vowels are written as a series of marks, generally below the other letters. An example from my article on fonts:
![]()
In the above text, the blue marks are nikud. In general nikud are not needed for advanced readers of Hebrew, and if you were to buy a Hebrew-Language newspaper or a book in a bookstore, none of them would have nikud, except for when the meaning of the word could not be determined otherwise.
Recently, I had reason to add nikud to a document, and I decided to finally figure out how to add them. Keep in mind, I use a Mac, so these are Mac-specific instructions. For general information on nikud, and codes that can be used on Windows, see the Wikipedia article Niqqud.
On the Mac, there are two keyboard layouts you can use for Hebrew.
First, there is the standard Hebrew layout that is what is used in Israel on all computers.
Second, there is something called Hebrew QWERTY, which maps the Hebrew letters to the closest sounding letters in English, so for example Reish (ר) is mapped to the R and Nun (נ) is mapped to the N. There are some useful shortcuts, like end-letters (in Hebrew some letters change form at the end of a word) simply being Shift and the standard key. For someone who works mostly in English and only occasionally needs Hebrew, Hebrew QWERTY is much quicker to learn.
Adding nikud to text can be done with either layout, although there are some differences. In both cases most nikud are added by using a special key combination, usually using Option (Alt) and a second key. In the standard Hebrew layout, most of the nikud map to Option and a number. For example, adding a kubbutz (which looks like three diagonally arranged dots – as in אֻ) is done by typing a letter and then the key combination Option-8. Just like Hebrew QWERTY tries to map the sounds of letters, it also tries to map the sounds of the nikud, so for the example above of the kubbutz, the key combination is Option-U (the kubbutz sounds like a U).
Hebrew QWERTY can use most of the key combinations from the standard Hebrew layout as well, although not all. All the Option-Number combination (i.e. 0-9) can be used on both layouts.
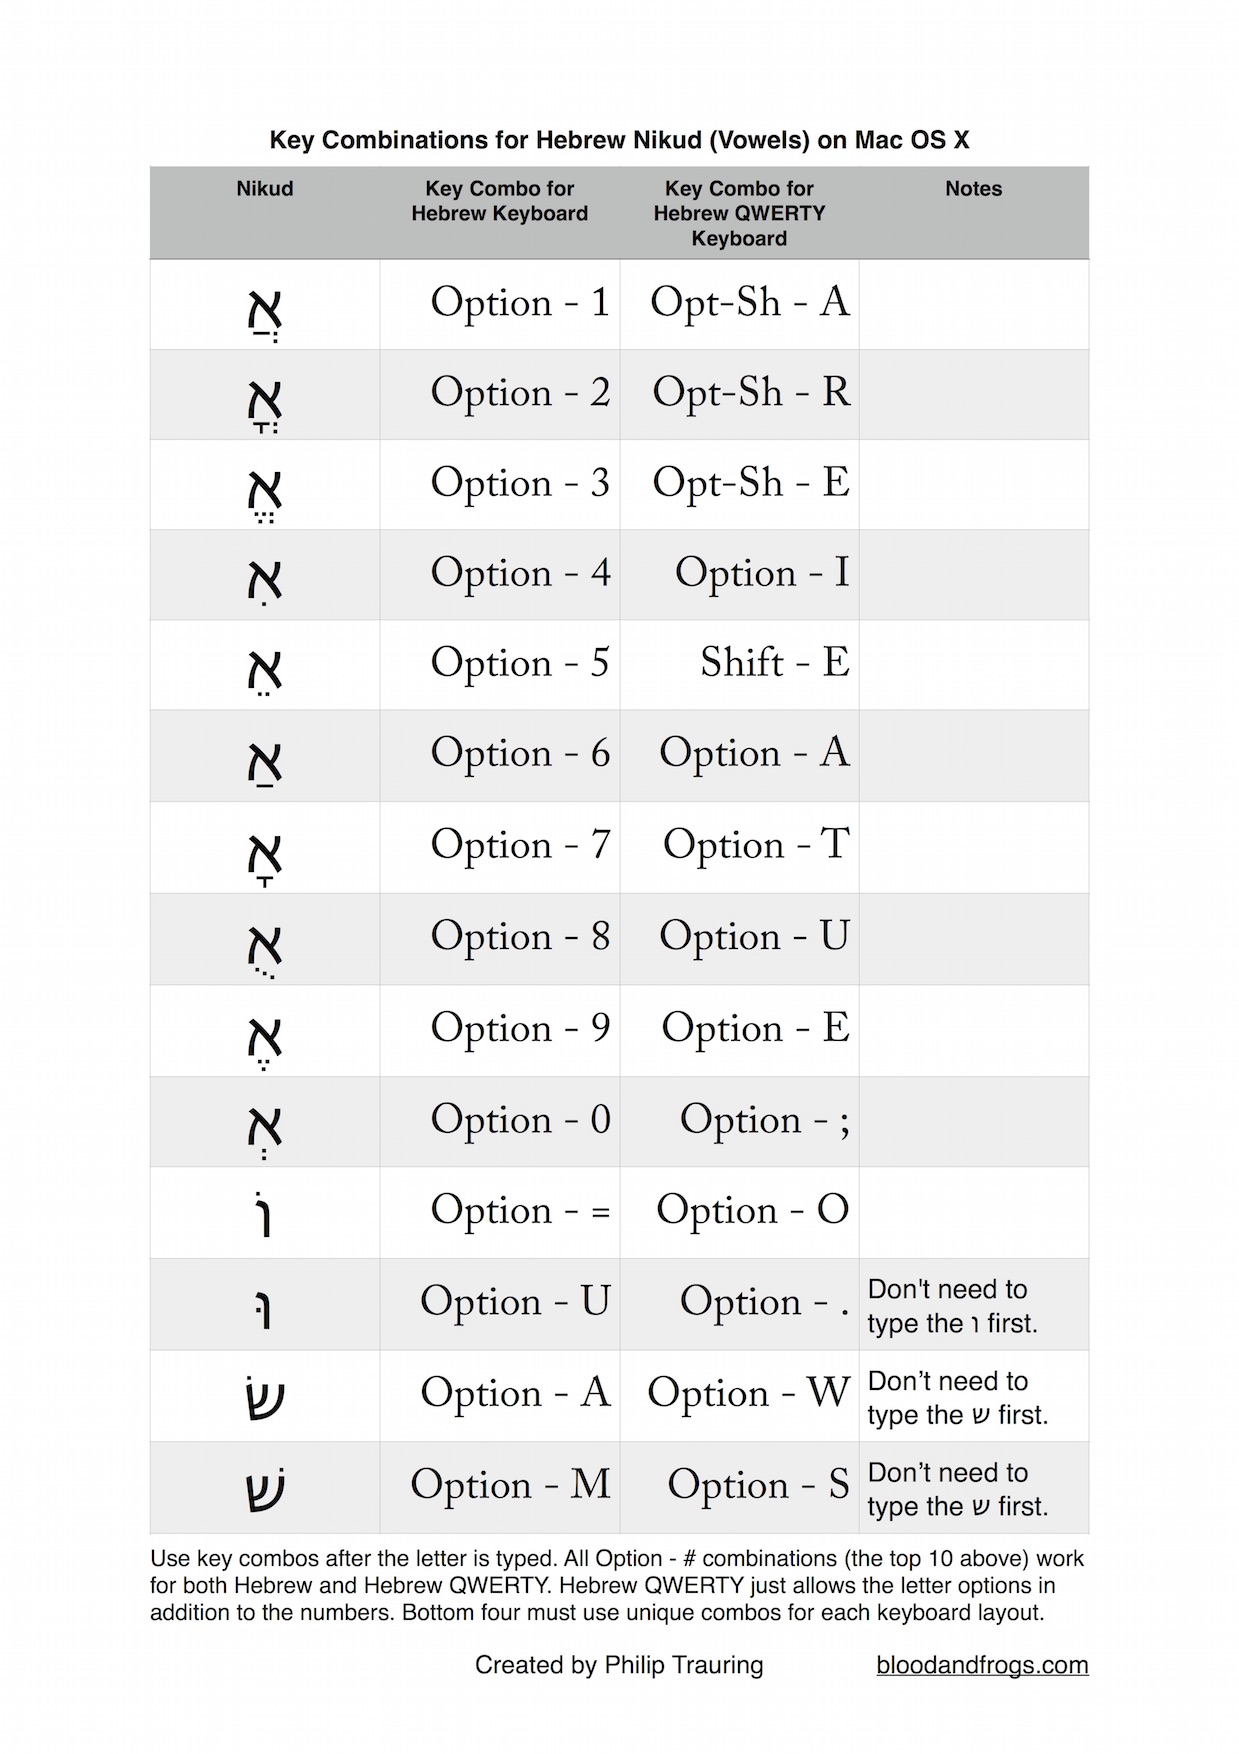
In order to make it easy to learn, I’ve created a chart that lets you figure out which key combination to use for each nikud. You can download it as a PDF and print it out for easy reference. The first ten combinations are shown using the letter Aleph (א) as an example, with the nikud added. When I write Opt-Sh I mean Option-Shift together with the key shown after it. The next two use a vav (ו) as the example, and the last two are specific to the sin/shin (ש). Most of these nikud can be used on many different letters. I have only added the most common nikud, although there are some more rare ones. For those, I suggest taking a look at the Wikipedia article Niqqud.
The chart is below. You can also download a PDF version if you want.