Genealogy is not just the collection of names, dates and locations, but an attempt to preserve memory. One of the best ways to preserve memory is through the use of photographs. It’s one thing to say your great-grandfather lived in such-and-such a place, and was born on such-and-such a date, but if you have a picture of him, he suddenly becomes more than just name, but in some way he becomes real in a way hard to accomplish with just the written word. It’s a common aphorism that a picture is worth a thousand words, but I would say that in the case of your family history that understates the significance of having photos of people in your family tree.
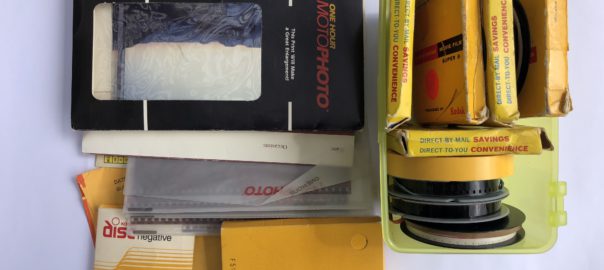
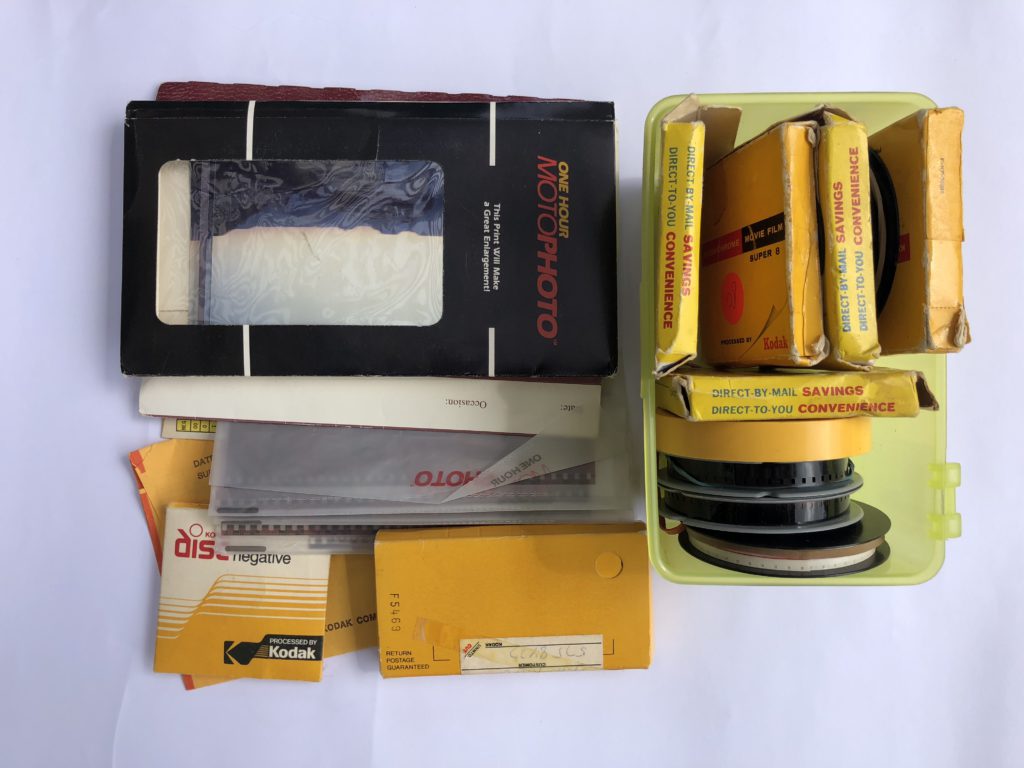
In today’s world where almost all photos are digital, it may be easy to forget about slide film and negatives (aka print film). However, you (or your parents or grandparents) probably have old negative and/or slides in a drawer or closet someplace that you forgot about. The way these slides and negatives are normally stored (i.e. how they were received from the photo processor) can lead to their deterioration faster than if you store them properly.
So here’s the truth – all photographs fade. There is no way to truly prevent photographs from deteriorating over time. The best we can do is extend their life. The good news is that there is a lot we can do to extend their life (in most cases).
The enemies of photographic media are light, heat, humidity and chemical fumes. Many of the storage mediums bought for photographs in the past (and even today) contain chemicals that can actually eat away at the photographs. Even chemicals in wood and glue used to make a wooden cabinet can seep out and cause damage to photographs. Those ‘magnetic’ photo albums that are so common, where the photos stick to the page and then are covered with a plastic sheet? In most cases, both the glue that makes the pages sticky and the plastic sheet covering the photographs can be bad for the photos. Did you or your ancestor glue photos to album pages? Think the glue was archival quality non-acidic glue?
Slides
Let’s start with slides. Slides have the best longevity of various photo mediums, although they too will fade over time. Kodachrome, the first successful color film, uses a technique unique among slide films that contributes to being stable in the dark for well over a hundred years. One study estimates that it would take 185 years before the least stable dye (yellow) in Kodachrome would fade 20%. Another problem among film and prints is their tendency to turn yellow over time, something Kodachrome also is uniquely (for films dating back that far) immune. In recently years, let’s say the past 25 years, films and papers have improved significantly, but nothing matches Kodachrome which was invented in the 1930s.
During the 1940s through the 1960s or so, Kodachrome was the film of choice. Many families would sit in their living room and watch photos of their family trips projected onto the wall. Ironically, Kodachrome will fade faster than other slide films when left in a projector. So what happened to all those slides from all those families? Frequently they were actually left in the slide carousels which were stored in boxes. A family might have kept a stack of these boxes, and whenever they wanted to see photos of a particular trip they would open the box, take out the carousel, put it in the projector and watch. Carousels came in a few different types – some round (the carousel would rotate the whole carousel) and some straight (the projector would move through from beginning to end). It’s important to note that the order of film in a slide carousel is not necessarily the order of the film shot, nor even from the same roll of film. Sometimes families would buy pre-made slides of the place they visited (perhaps shots they would never be able to take) and mix them in with their own slides, to better show off the place they had visited.
As this blog does focus on Jewish genealogy, I should point out that Kodachrome was invented by two Jewish musicians. Indeed, while they had studied chemistry and physics, they were, for lack of a better term, hobbyists when it came to photography. Jews were not hired as chemists in those days, so they worked in their kitchens on their ideas for color film. When they made progress, Kodak wouldn’t hire them, but private funds helped them set up a laboratory on their own. As they made progress Kodak finally bought the rights to any film they developed, but still not willing to pay them, did so in a deal offering them future money per foot of film sold (thus no risk to Kodak). That ended up working out pretty well for a couple of Jews who couldn’t get jobs in chemistry, yet ended up creating what would become the most popular color film for decades to follow. Both would continue in their careers in music following the creation of Kodachrome.
Okay, history lesson over. You’ve collected your slides, in carousels and/or boxes, now what? The first thing I suggest doing is labeling your slides. Every single one of them. This takes a bit of organization first.
First, organize the slides into rolls (i.e. organize them into the original order they were shot on the individual rolls of film). If your slides were already in one box per roll and properly ordered, you’re ahead of the game. If not, try your best to organize the slides into rolls. You might choose instead to organize them around the original slideshows if you found the slides in carousels, but then you might also find boxes with slides that didn’t make it into the original slideshows and you’ll have to decide how to fit those in as well. Assign a name to each roll (or slideshow). If, for example, you’ve collected slides from different people, you could organize them by naming them after the person who took the photos and assigning a roll number. So if you received a box from your cousin Robert and a stack of carousels from your grandfather Charles, then you might have a roll labeled robert01, another named charles04, etc. For each slide you will label the slide with the slide number, so for the roll robert01, the 22nd slide would be labeled robert01-22. We’ll get to how to label them in a minute.
Second, put the slide into archival plastic pages. These are essentially pages that fit into 3-ring binders or which you can hang in hanging filing systems. They usually will hold 20 slides, so in most cases you will need two sheet per roll of film. You can find these in most photography stores, archival suppliers, and many places online. Some major manufacturers of slide protector pages:
Print File
Archival Methods
Light Impressions
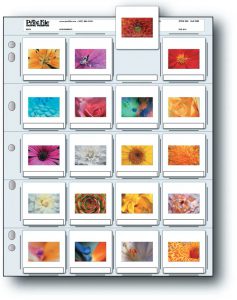
Photo retailers probably sell the pages from Print File. Other companies make their own. The most important thing is that the material used to manufacturer the sheets is archival – for slides this will usually be polypropylene (negative sheets may use polyethylene as explained below). You might notice that different companies manufacturer these in different thicknesses, measured in mils. Archival Methods sells their sheets with 2.5mil polypropylene. Light Impressions actually sells their sheets in two different thicknesses, 3 mil and 5 mil. Print File manufacturers their pages out of 8 mil polypropylene. You can decide which brand you prefer.
Each of these companies also sells binders or binder boxes (my personal favorite), for storing these pages. Keep in mind that if you are going to go to the trouble of getting archival sheets to store your slides, you should also get an archival binder. You can also buy sheets intended to be hung in a filing cabinet. If you have a filing cabinet this might be a good option, just keep in mind you want to make sure everything in the filing cabinet is archival (so if you’re planning on sharing the space with your bills and other documents, this might not be such a good idea).
You might be asking, what is ‘archival’ and how do I know if something really is archival? Well, the basic answer is something is archival if it contains no materials that will contribute to the deterioration of the items stored within. As mentioned before, even the glue in a wood cabinet can seep out fumes that will ruin your photos. For example, based on the issue with cabinets, many professionals will only store their photos in steel cabinets. As to how you know if a particular product is really archival, there is an organization called the Image Permanence Institute (IPI) which has a test called the Photographic Activity Test (PAT) which tested products for their effects on photographic materials. If the product shows it has passed the PAT test, you should be safe.
The PAT test applies to anything that comes in close contact with your photographs and film, and indeed even when having your photos framed you should make sure the mat surrounding the photo has passed the PAT test. If you’re buying a frame with a pre-cut mat in a retail store, it might not be so easy to find that out, but if you’re having a photo professionally framed, the framer should be able to tell you if the mat they use has passed the PAT test, or should be able to find out from the manufacturer.
Okay, so you’ve organized your slides into rolls and placed them into plastic sheets, with an assigned roll name written on the top of each sheet. Now we get to the hard part, labeling each slide. If you received the slides from a relative who is still alive, I recommend now visiting them with your newly organized slide pages and going over each roll and determining who is in each photo and when and where the photos were taken. This might not be so easy if you have not yet scanned the photos since slides are hard to see, especially by elderly relatives, but you can either scan the slides first, showing the photos on the computer, or bring along a slide viewer (a small hand-held viewer that magnifies the slide a bit works well). Once you know everything you can about every slide, you need to create labels. This is really only possible by computer, and let me explain how.
Labels
I used to use Avery 5167 return-address labels for this purpose, as they are actually the exact size necessary to fill either the top or the bottom of a slide mount. This is a well-known fact among photographers. If you find some special ‘slide label’ for sale, you’re probably just overpaying for an inferior product. That said, there is a problem with the Avery labels, and that is that they are not archival. Avery does sell some archival products, but apparently their return-address labels are not among them. The good news is that some of Avery’s competitors do provide acid-free and lignon-free labels that are the same size.
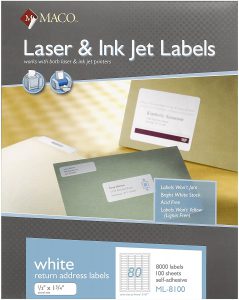
One company, Chartpak, has a product line called Maco and a product called ML-8100 which is similar to the Avery 5167 and is acid-free and lignon-free. I doubt they have submitted their products for the PAT test (since it is not intended for archival purposes but for return addresses), but Avery is not acid-free or lignon-free so I would suggest going with Maco or another company that does claim their labels are acid-free and lignon-free.
All of these companies provide templates that you can use for their labels on their web sites. (Avery’s 5167 Templates, Maco’s Templates). Microsoft actually provides Avery templates with Word I believe. Avery also has free software you can use for printing their labels. In any case, you open up the template and fill in the information on each slide. I recommend putting the unique identifier you’ve come up for each slide (i.e. robert01-22 in the above example) on the top line, then following it with date, location, event and who is in the photo. There is a lot of copying and pasting here, since the information is largely repetitive. Once you’ve filled out the template, print out the labels and affix them to each slide.
Great, so you’ve organized your slides into rolls, inserted them into plastic sheets, collected all the information on each slide and labeled them properly. That’s a huge amount of work, believe me. If you’ve done this, you owe yourself congratulations.
Negatives
Moving on, we have negatives. I’ll be discussing 35mm negatives, but the idea is the same with other sizes, if not specifics. There are generally two kinds of negatives, black and white, and color. Color negatives only became available in the 50s and probably only became really popular in the 70s.
The good news is for black and white negatives, their longevity is quite good. Black and white negatives are usually formed by particles of silver, and thus do not fade like color dyes. The bad news here is that color negatives don’t last as long as slides. They fade quickly, and if you left them in the original envelopes you received from the photo processor, they were not kept in the best conditions. If you have old color negatives, they may have already faded beyond usefulness.
The other problem with negatives is that they are obviously harder to check. Most people can’t easily look at a negative and know the quality of the print that will come from it. If the negative has faded a lot you might not even be able to see the image, which would be a good hint, but most people will not be able to tell too much by looking at the negatives themselves. What this means is that you either need to print from the negatives to find out their quality, or scan the negatives. As my suggestion with all photographs is to scan them immediately, this is obviously the path I would take. It’s up to you if you want to put your negatives into pages first, or test them out by scanning first. Personally, unless you can’t see any image at all on the negatives, I would put them into archival pages and then scan all the images.
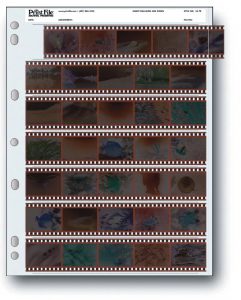
The same companies mentioned above sell pages for preserving negatives. These work similarly to the slide pages, except you slide each negative strip (usually 4-6 frames per strip) into the page. There are seven slots, so depending on the number of frames per strip (decided on by the photo processor) and the number of frames in the roll you may need a second page for the roll. Obviously if your roll was 36 frames and you have a 35-frame page (5 frames per strip, 7 strips per page), you will need to find a spot for that last image in a different page. If I’m collecting negatives from a series (i.e. from the same trip) I usually will keep a page for those extras and keep them together.
There are different materials used for these kinds of negative preservers.
First, there’s polypropylene like that used for the slide sheets. Polypropylene is used for slides because it is very clear, and since people tend to look at their slides while still in the sheets (by putting them on a light table, or holding them up to a light source) it is important to be very clear. One negative aspect of polypropylene is that it has a tendency to attract dust, and you don’t want dust on your slides and negatives. Keep in mind with polypropylene pages to check your slides and negatives for dust before scanning. Use a can of compressed air to clean them before putting them in the scanner.
Another material used for negative pages is polyethylene. Polyethylene is not as clear as Polypropylene, which is actually a benefit since it means less light coming through to the negatives. Since people tend not to view negatives through these sheets and don’t need color fidelity when looking, the clarity of polypropylene is not a benefit for negatives. In addition, the fact that polyethylene does not attract as much dust as polypropylene, means it’s better for archival purposes. Thus, for negatives I would use polyethylene pages. Truthfully, I’m not sure if all the companies sell polyethylene pages for negatives, but I know Print File does, and I recommend their pages.
There is a third material available, called either Mylar or polyester. This is even clearer than polypropylene and relatively expensive. I don’t think it is necessary, and certainly not for negatives. Print File actually sells polyester sleeves that fit around individual strips of negatives, and then are inserted into polypropylene pages for storage, thus allowing you to take out the individual strip for viewing in the clearer Polyester protector. This is overkill in my book, and really only intended for professional photographers.
When it comes to labeling negatives, you obviously have no place to put labels on the film itself. I would thus suggest naming the roll just like you did for the slides, and then typing up a description of each frame in the roll to keep with the film. You can just keep these descriptions on your computer, or since you’re putting the negatives in binders anyways, you can print out the descriptions, hole-punch the sheet and put it in with the negatives. Remember if you’re putting paper into the binder to use acid-free lignon-free paper!
Prints
Preserving prints probably deserves its own posting as this one is already getting way too long, and there is a lot to discuss. I’ll try to be brief. Basically if you have a box full of family photographs, or a stack of albums, you should consider putting all the photographs into archival binders. It is unlikely that 50 year old photo albums are made of archival materials and your photographs are literally being eaten by these old albums.
Unfortunately, when it comes to prints, it’s not usually as a simple as just placing the photographs into sheets. There is usually a process of removing the photographs from their old albums. Even those ‘magnetic’ albums which were supposed to be easy to remove photographs from can over time permanently attach themselves to the photographs. As mentioned early, it was common in the old days to glue photographs into albums. It’s not so easy to remove a photograph from a glued-in album. There are various techniques for doing this, and it depends largely on the specific type of album and glue being used. As such, I won’t go into detail on this topic, but I will say that if you have any doubt about your ability to remove a photo from an album, you should consider it very carefully, and in either case scan the photograph first. In my case, I usually remove those that are easy to remove, scan those that are difficult to remove, try to remove the difficult ones, but if I think I may damage them I just leave them in the old albums and am content to have the scan. After I finish I scan the photographs I removed from the old albums and put them in archival storage.
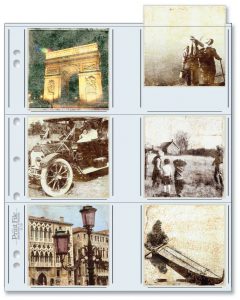
Old photographs came in different sizes than we are used to today, usually smaller than out current standard print sizes, and usually square instead of rectangular. Print preserver pages tend to come in the standard sizes available today, not in sizes from 50 years ago. As such, I try to find sheets that have slots the same size or slightly larger than the prints I am preserving. As the sizes can vary greatly among the prints I’m preserving, this means buying a variety of different sizes. Since the prints are smaller than the pockets they are being put into, and you want to be able to use both sides of the sheet, I buy non-acidic paper inserts to go into each pocket of the plastic pages. Thus, even if a picture on one side is very small, you will have a nice white background behind it, instead of seeing through to the print on the other side. This also helps isolate the prints on either side of the paper from each other. Make sure the paper is non-acidic. Basically buy it from an archival provider. Archival Methods sells inserts for all their print pages.
Needless to say, if there is any glue or other adhesive on the prints you find, you should try your best to remove it as the fumes from the glue can damage your photographs over time.
So you buy the plastic print preservers with matching paper inserts (i.e. if you buy a package of 25 sheets of 4×6 print pages, which hold 3 4×6 prints each, you need 75 paper inserts). Insert the paper inserts into the pages, and then put in the prints. With very small prints where you can fit more than one into a sleeve you can do this, but be aware that the print can move around and overlap which could be problematic. I would try to stick to one print per side of each sleeve as best you can, which is why I suggest buying a variety of sizes of print preservers.
Labeling the prints is important, but obviously do not write on the prints themselves! You can buy archival labels and affix them to the plastic sheets with information on the prints underneath them, or you can number the print preserver sheet and write up the print descriptions separately. After you scan them you can even create index sheets with thumbnails of each photo with their description of each photo next to them, but if you’re going to put that paper inside the binders, remember to use acid-free lignon-free paper.
Like I mentioned earlier, I like to put my photographs in binder boxes, which most of the archival companies sell. Binder boxes are basically boxes with a the rings of a three-ring binder inside. The boxes must also be archival (and pass the PAT test) but if you source them from a reputable archival provider, that shouldn’t be a problem. These boxes tend to be very sturdy and protect your photographs from being banged around. As they are closed, they also prevent photographs from falling out of the sheets since there is no place for them to go. They are also stackable, which is sometimes very helpful when finding where to put your precious photographs.
Once all your slides, negatives and prints are in their pages and the pages in their binders, now all you need is to find a safe place to put them. Make sure it doesn’t get too hot, there isn’t a lot of humidity, and there are no chemical fumes. Basements and attics are thus not usually the best place to keep photographs.
I suspect this is my longest posting so far. Maybe too long. Hope it was helpful to someone.
Thank you for a most comprehensive blog.
Also as a retired professional photographer from the ‘wet processing days’ I fully agree with the sentiments and advice .
As your blog is dated a couple of years ago? I am wondering if an update is available.
Sorry not finished reading this page…
As I am in Australia many of the firms and resources are not practical for our uses.
We do have an excellent archive supplier, can’t recall it right now. Expensive though.
Incidentally all my collection of photograph materials from about 1900 is still excellent.
Hopefully my wet processed photographs for clients have survived our extremes of heat etc.
Thank you again. I will look out for your blogs.
Noel Fields, Australia
Using all Apple products and Reunion.