I really like the idea of an open-source genealogy program. The only real open-source genealogy program that runs on the desktop seems to be GRAMPS. GRAMPS stands for Genealogical Research and Analysis Management Program System. Yeah, I’ll stick with GRAMPS. Originally developed for Linux, it now has versions that run on Windows and on the Mac. I’ve tried it in the past but never really gotten it to work. When I saw a new version released today I installed it and tried again.
Unfortunately, I ran into error messages right from the beginning. I suspect this has to do with running the program on a Mac, a platform they claim to support, but which is not supported very well. After I got past the initial error messages (which prompted me to submit a bug report, but the bug reporter feature led to an error as well) I tried to import a GEDCOM, but found that the Import function didn’t do anything.
I suspect GRAMPS run significantly better on Linux, but alas most people don’t use Linux. As with most open-source projects, the development of the project is directed by those developers who choose to do the actual work. In the beginning, all the developers of GRAMPS were on Linux, and the goal was to create a genealogy program for that platform. It is common sense that under such a situation Linux would be the focus. Over the years GRAMPS has added developers who have chosen to make GRAMPS work on other platforms.
In a recent blog post by one of the developers in response to a post in their own forum about a two-year old blog posting on GRAMPS for Windows, the general ideals of this (and many other) open-source project is revealed, that the developers decide what is best, and if you don’t agree then become a developer for the project and then you can’t have an opinion. In this case, the original two-year-old blog posting was recommending a very specific technical route to take, which I would agree if you’re not going to contribute to the development efforts, is probably a silly thing to do. Developers don’t listen to outside suggestions – they listen to inside suggestions, so even if a developer working inside the project made the same exact technical suggestion, it would be better received than from an outsider. Why a developer decided to bring this up two years later, when the technical issues being discussed are very different than they were in 2008, however, is beyond me.
I would agree with the original sentiment of the two-year-old posting, however, that if you are going to port your application to platforms like Windows and Mac, you should be prepared to use the interface tools available natively on that platform. The look of GRAMPS on the Mac, while familiar to a Linux user, is totally foreign to a Mac user. If I was going to make a suggestion to the GRAMPS developers, it would probably be to look at a cross-platform GUI toolkit like wxPython which lets one use native GUI widgets for each platform, so on Windows the buttons are Windows buttons and on the Mac they’re Mac buttons. If they really wanted to support the Mac natively they could look at PyObjC, but that wouldn’t help them for Linux or Windows, so wxPython is probably a better choice. Of course, I’m not a developer, and I am not offering to become one, so my opinion doesn’t really count here.
The hopefully good news here is that in that same developer blog posting, he says the forthcoming 3.3 version has the best support for multiple platforms GRAMPS has ever had. It’s planned to release in March, so I guess we’ll see then how GRAMPS has improved. When GRAMPS 3.3 is released, I expect to try it again, and post the results here.
Anyone reading this using GRAMPS? I’d love to hear your thoughts in the comments.
[June 27, 2011 – I’ve posted a follow-up to this post on a newer version of GRAMPS, 3.3.0, which is improved in terms of stability, but is not yet ready to use on a regular basis on the Mac in my opinion.]
[This organization system works great on my Mac, in my opinion, but may not work well when using the Windows operating system, which apparently has restrictions on the total length of the file path (path from disk through all the folders and subfolders, plus the file name) that would limit the number of sub-folders you could use. It’s possible to fix this in Windows 10, but I don’t want to recommend something beyond the capabilities of most users.]
When doing genealogy research one tends to collect a lot of documents and photos. There are birth certificate, census records, naturalization papers, passenger manifests, marriage records, death certificates, etc. Keeping track of everything can be a daunting task.
To make matters worse, most genealogy programs will not manage your files themselves. Even if they could, you wouldn’t necessarily want your genealogy program to manage everything, because you might one day want to switch programs, and you don’t want to lock your files into one program. As such, most genealogy programs will link to documents elsewhere on your hard drive. If you organize them well, it’s easy to find them and link them. What happens when you move files around though? That can cause big problems for genealogy programs that are expecting to find a file in a particular location. Different programs deal with this issue in different ways – some will show you which files are missing, some will help you find the files, etc. but in general you want to minimize such issues by putting your files in a place that will not change very often.
I’ve come up with a system for organizing my files that seems to work pretty well for me. It helps me find things quickly, lets me add new folders for new branches of the family without moving other folders and it is flexible enough for me to mix it up a bit if I need to for different situations.
I start with a main folder for my genealogy documents. Let’s call that Genealogy. You want to put that someplace where you know it will not move. I keep it in my Documents folder (on Windows that would be your My Documents directory).
Inside the Genealogy folders called Surnames, Photos, and Documents. In Surnames I create folders with the surnames of each of my great-grandparents, so eight folders in all.
Photos and Documents are not just to dump all my photos and documents, but are special folders where I keep large collections of photos and documents that are not associated with one person. Thus if I scan a hundred photos from a cousin that covered a large portion of my family, I would put those in a folder under Photos. If I retrieve a large batch of vital records from an archive in Poland, I create a folder for those in the Documents folder. In some situations it’s very helpful to keep these kind of collections together in individual folders not attached to one family.
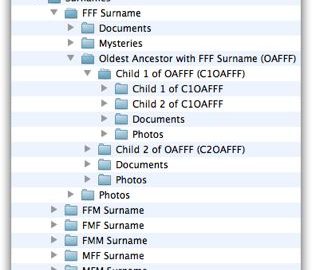
Back to the Surnames folder. So there are eight surnames each with their own folder. You can of course choose to add more surnames. You might want to add a spouse’s surname, either your own or one of your siblings. In the picture below you can see the folder structure I’m describing, and each surname folder is labeled FFF (for Father’s Father’s Father’s) Surname, FFM (Father’s Father’s Mother’s) Surname, etc. Within each of these folders, I again put Documents and Pictures folders and I add one more called Mysteries. Mysteries is for records you find of people that you think are related, but you haven’t found a connection to yet. I just create sub-folders in there with different leads I’m following on different people, so I have a place to keep research that is not linked to my family tree yet.
This is where I do something that might seem confusing, but I then add a folder which is for the oldest known ancestor with that surname (in the diagram I call him/her OAFFF – Oldest Ancestor of Father’s Father’s Father). Within that folder I add folders for each child, and within each of those folders their children, etc. Within each person’s folder I also add a Documents and Photos folder, although with each person I can change my mind on how to organize the folder. With some people I might have a lot of newspaper clippings so that might deserve it’s own folder called Newspapers, and in some folders I might only have a single photo so I might forgo the sub-folders altogether (except for the children’s folders obviously).
A sample genealogy folder hierarchy
Keep in mind that the advantage of this system is that whenever you discover a new child or a new sibling of someone in your tree, you can add them to the folder hierarchy without having to move any other folder. The only time you will need to move a folder is if you discover a relative that is from an earlier generation than your current oldest ancestor. Hopefully you do find new oldest ancestors all the time, but in the scheme of things, it doesn’t happen so often that this should be a major problem.
I usually label a folder that represents the child with that child’s full name and all the name of their spouse. If the child was born Jane Doe and married John Deer, then the folder would be named:
Jane Doe & John Deer
I always put the name of the child first and the spouse second. Of course when there are multiple marriages this can be complicated. In some cases (even without mutliple marriages) I will only name a folder with the person’s name, and then create a sub-folder for the spouse (or more than one folder if there is more than one spouse).
You might be asking, why do you start with the oldest ancestor and work your way down? Why not start with the current generation and work your way up? That would eliminate the need to move folders once you find a new oldest ancestor. The problem is that what happens when you want to add siblings? If I add a folder for myself, and then underneath it I put folders for each of my parents, where do the siblings go? Also, for each generation that I go up I’m splitting surnames. When I move down everyone is a descendant of a single surname. It only works when you’re moving down, which is why you need to start at the top.
There’s probably more to say on this topic, but I’ll stop here for now. I welcome comments on this system, explanations of your own folder organization systems, etc. in the comments.
For many Jewish genealogists, there is a kind of ultimate brick wall of reaching past the institution of surnames around two hundred years ago. Surnames were instituted in different areas at different times, but the Austro-Hungarian Empire, for example, instituted surnames by declaration of their emperor in 1787. When the empire expanded in 1795 absorbing part of Poland, it took in a large Jewish population which were for the first time required to take on surnames. Depending on where they lived, some Jews were not required to take on names for another decade or more after that, so if you have successfully tracked back your family to the point where they adopted surnames, it’s not so easy to reach past that point. There are some patronymic records, which are records that only list the first name of a person and the name of their father, that exist in these areas going further back, and it may be possible to track your family back for a generation before surnames, but that’s really the maximum most people will be able to accomplish if their families did not have surnames earlier (which some rabbinic families did, as did many Sephardim).
Adding to the difficulty of tracking back that far is that many Jews had little use for their assigned surnames in the 19th century. Thus, even though they had assigned surnames which the government used to assess taxes, conscript men into the army, etc., in terms of everyday usage Jews really didn’t care about their surnames. In addition, civil marriage was largely ignored by many Jews, as it generally was expensive. Jews tended to have religious marriages and only got civilly married if they or their children for some reason needed it. This thus lead to many civil marriages long after a couple had their children, something which might seem strange at first glance, but you need to realize thati n most cases these people did get married (religiously) before they had children, they were just not married from the perspective of the state.
So what happened if your parents did not have a civil marriage? In some cases it meant you would need to take your mother’s maiden name as your surname. That’s because even if your father was listed on your birth certificate, he was not legally married to your mother, and thus you needed to take on your mother’s last name for legal purposes. If you parents were legally married at a later date, a note could be written on your birth certificate in the town records showing that your parents were legally married, and thus declaring you as legitimate (and able to take your father’s name).
In the late 19th and early 20th century, civil marriage became easier for Jews, and thus around this time if you look at marriage records you will see a large number of marriages that seem to be relatively old people. In many cases these married couples already had children and grandchildren. As their children and grandchildren became more mobile and wanted to travel out of the small towns they had been in, they needed travel documents, and in some cases this was only made possible if their older parents got married (at least if they wanted to get travel documents with their father’s surname instead of their mothers).
I have a number of examples of children taking on their mother’s surnames in my own family.
In one case two sons took on their mother’s surname when born. One traveled through Europe and eventually ended up in the US, where the passenger manifest for the ship he arrived in the US on shows he and his children still with his mother’s surname. When he became a naturalized citizen a number of years later, however, he had already changed his surname to that of his father (as did his children). The second son moved to Israel, where he kept his mother’s surname. Thus two brothers living in different countries with different surnames.
Another case was utterly confusing for a long time, until I was finally able to put the pieces together. I had the birth record for a woman named Taube Traurig. I had birth records for children of Taube Traurig and a man named Wigdor Kessler. It seemed likely that the Taube Traurig from the original birth record and the Taube Traurig who had children with Wigdor Kessler were the same person. Then I ran into something strange, a death certificate for Taube Traurig (relatively young) before the children were born. This thus indicated either a mistake in the records, or a second Taube Traurig. The problem was that I didn’t have another Taube Traurig in my records that could be the mother (there was another Taube Traurig, but she was the mother of the two sons in the previous example – and a first cousin of the one in this example).
This was a mystery for a long time, until I noticed a notation on the original Taube Traurig’s birth record that had the name Wigdor Kessler on it. That made no sense to me. How could the name of her husband be on her birth record? Not being able to translate the Polish annotation, I posted an image of the birth record to ViewMate, a great service from JewishGen that lets you post an image or photograph and ask for help with translating records or any general problem-solving that you think others can help you with concerning the image. The responses I got indicated that the parents of Taube Traurig had been legally married in 1906, thus making all of their children ‘legitimate’ in the eyes of the state. Wigdor Kessler had signed the records of the couple’s children in 1906 as a witness that they were now considered legitimate by the state.
The person who translated the record for me had said something which stuck with me – he said Wigdor Kessler was not listed as the husband of Taube Traurig in the record. Now I didn’t necessarily think they would require him to state he was the husband, but I also guessed the person telling me this had seen other similar records and if he made the comment, he probably had seen others indicate they were the husband. I also found another record which showed Wigdor Kessler having a child several years later with a Taube Engelberg instead of Taube Traurig. That was utterly confusing since the original Taube Traurig had a sister Sara who had married someone with the last name Engelberg.
So what’s the answer here? The Taube married to Wigdor Kessler was the niece of the Taube in the original birth record. Searching through the marriage records I was able to find a marriage record between Wigdor Schopf and Taube Engelberg after all the children who were born where Taube’s name was listed as Taube Traurig, and before the child was born where she is listed as Taube Engelberg on the birth record. Who is Wigdor Schopf you’re asking? Schopf was Wigdor Kessler’s mother’s name (as shown in the marriage record). Traurig was Taube’s mother’s name. Her father’s name was Engelberg. Thus in all the earlier birth records she had been using her mother’s surname. Wigdor had used his father’s name all along on the birth records of his children, although why he had to use his mother’s surname in the marriage record is not clear.
Thus there were four birth records from 1898, 1900, 1902 and 1904 where Wigdor used his father’s surname and Taube used her mother’s surname. A wedding record in 1905 where Wigdor used his mother’s surname and Taube used her father’s surname. Finally, a birth record in 1910 where Wigdor uses his father’s surname and Taube uses her father’s surname.
What is not clear is why Wigdor was able to use his father’s surname in his childrens’ birth records but not his own marriage record, and why Taube used her mother’s surname in the first four birth records, but then used her father’s surname in her marriage record and in the later birth record. I would surmise that this later Taube’s parents were legally married in between the birth of Taube’s fourth child in 1904 and her marriage in 1905, although I have nothing to indicate that other than her own change of recorded name.
So what lessons have we learned here? If you’re researching your Jewish family in Poland or the surrounding countries, and they were born in the 19th century, don’t assume a person took on their father’s surname. Genealogy programs tend to automatically fill in the father’s surname when adding a child record, thus it’s easy to create a record where you assign the father’s surname even if you have no evidence that the child used the father’s surname. In many cases it might be a safe assumption, but in the case of 19th century Jewish records in Europe it clearly is not a safe assumption.
Two books that discuss some of the issues involved here are Suzan Wynne’s The Galizianers: The Jews of Galicia, 1772-1928 and Alexander Beider’s A Dictionary of Jewish Surnames from Galicia. If you’re asking why I’m pointing to two books that specifically deal with Galicia (a region of the former Austro-Hungarian Empire which currently is partly in Poland and partly in the Ukraine), it’s because the issues discussed here were particularly prevalent in Galicia, and as a big chunk of my family originates in Galicia, it’s also the area I know the most about (and of which I know about relevant books).
If you’ve had similar stories of relatives taking on their mother’s surname, please add your stories in the comments.
If you’re seriously researching your Jewish roots then you already know about the JewishGen Family Finder (JGFF), but for those who are just getting started I wanted to point out this critical resource and explain what it can and cannot do.
The JGFF is part the much larger JewishGen web site, and what it does it simple – it lets you find other researchers searching for the same surnames and towns as you. This is particularly important if you have a very common last name (try researching Cohen without knowing which town your family came from) or if you don’t yet know from which town your family originated.
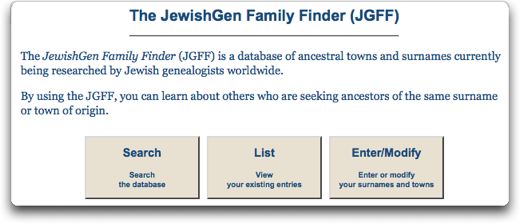
The JewishGen Family Finder (JGFF)
Let’s say you’re researching the name Cohen. You know your family lived at one point in Lancut. You go to the JGFF web site, log in (with your JewishGen identity) and from the page shown in the screenshot above, you select Enter/Modify. On the next screen you add the name Cohen and the town Lancut, Poland. When you enter a town that is in JewishGen’s database, a small icon should show up next to the town name indicating it has been found. You can enter a town that is not in their system, but chances are if you’re entering a town it’s in there and you should double-check your spelling. As with all resources on the JewishGen site, all towns are referred to by their current names and countries. Thus even though the Yiddish pronunciation of the town name of Lancut would probably be Lantzut, and the town was once part of the Austrian Empire, it is always referred to but the current name and country, so you should enter Lancut, Poland.
It’s also important to recognize what the JGFF cannot do. It doesn’t list individual relative names, so there’s no way to know right away when searching if the person who has listed a particular name/town combo is related to you. The JGFF is also reliant on the individuals who make up its members to update their information, and sometimes people change their e-mail addresses and forget to update the JGFF. If that’s the case and you try to send them an e-mail, you will not reach them obviously. You will also find that some of the members are deceased, and when a particular member dies, if you know the person, you can tell the people who run the JGFF and they will mark that account as deceased, so the information doesn’t go away, but people will know not to contact the person.
JGFF has several levels of privacy, so you can show you name, your address, etc. or you can just show your researcher number and make the people send you an e-mail to find out who you are. This sounds great, unless the person who didn’t show their name changes their e-mail address or dies, and there is no way to know that they have an account on JGFF to change. In general, I would suggest at least showing your name when setting up your listing, so in case someone wants to reach you, they can google you as well if necessary.
Different people have different strategies of how to use JGFF. You can put I think up to 100 name/town combos into the system, so you have some flexibility. You can stay minimal and just put the names and towns you know relatives were born into, or you can add many different variations for the names, and you can choose to add towns that may wrong, but you think your family may have lived. If you find a reference in your research to a town you didn’t know about, you can add the name/town combo in case someone comes across the same piece of information, even if you have no real proof that your family lived there. Remember that the JGFF is not a definitive listing of where families lived, it is only a list of where people are researching their families. This is an important distinction.
In the same vein, I recommend putting in as many variations of the last name as you’re comfortable with, as it seems some people are very strict with spellings or they may search during ‘exact’ spelling instead of ‘sounds like’ and thus like Cohn and Cohen might be the same family, if you wrote Cohen and they searched for Cohn, they wouldn’t find anything.
As you research your family and find new names and towns, you should be constantly updating your listings on the JGFF. You never know when someone is going to search the JGFF and if you don’t post a connection (like you find your great-grandmother’s last name and birth town) you may miss someone else searching for the same combination. In my own experience, I added a name and town of a relative that I had known about for a long time but had not bothered to post to the JGFF, and within a couple of months I received an inquiry from someone who turned out to be my fourth cousin, and who listed just 2 minutes away from me.
In short, if you’re researching your Jewish family members, use JGFF and use it often.
Genealogy is not just the collection of names, dates and locations, but an attempt to preserve memory. One of the best ways to preserve memory is through the use of photographs. It’s one thing to say your great-grandfather lived in such-and-such a place, and was born on such-and-such a date, but if you have a picture of him, he suddenly becomes more than just name, but in some way he becomes real in a way hard to accomplish with just the written word. It’s a common aphorism that a picture is worth a thousand words, but I would say that in the case of your family history that understates the significance of having photos of people in your family tree.
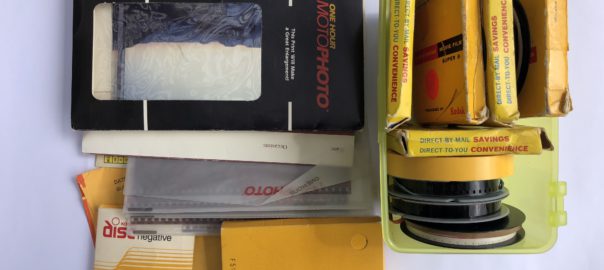
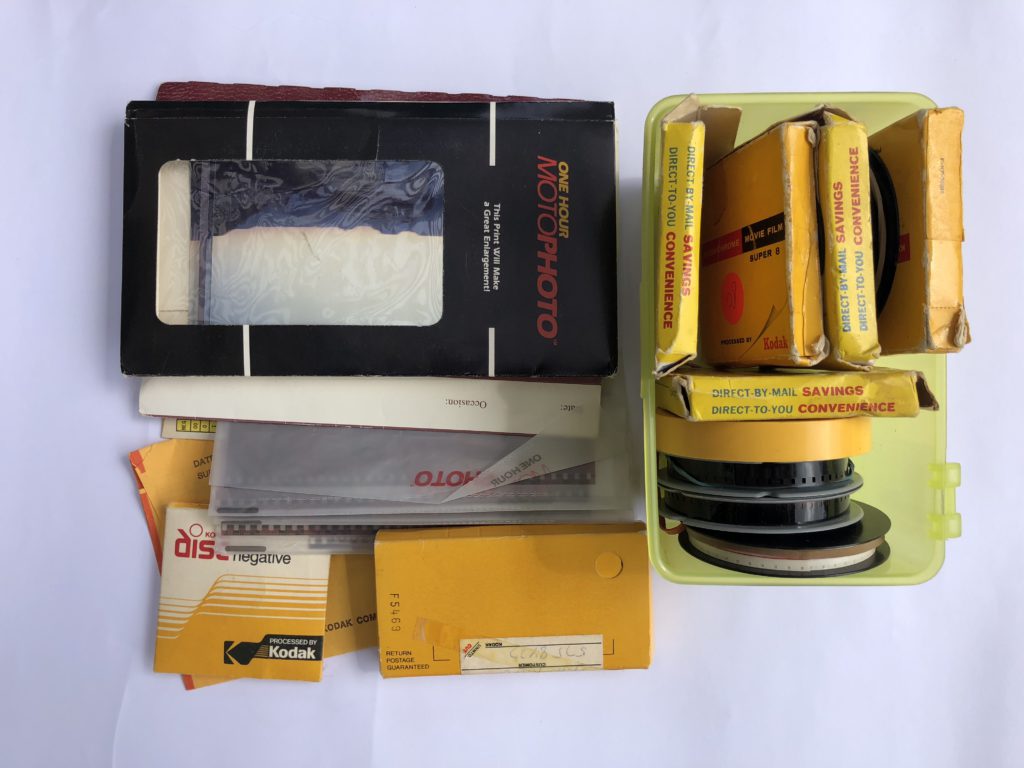
In today’s world where almost all photos are digital, it may be easy to forget about slide film and negatives (aka print film). However, you (or your parents or grandparents) probably have old negative and/or slides in a drawer or closet someplace that you forgot about. The way these slides and negatives are normally stored (i.e. how they were received from the photo processor) can lead to their deterioration faster than if you store them properly.
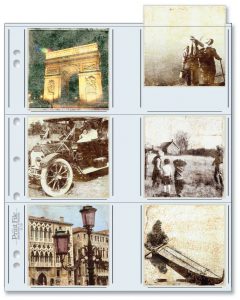
Do you have family photos stored like this?
So here’s the truth – all photographs fade. There is no way to truly prevent photographs from deteriorating over time. The best we can do is extend their life. The good news is that there is a lot we can do to extend their life (in most cases).
The enemies of photographic media are light, heat, humidity and chemical fumes. Many of the storage mediums bought for photographs in the past (and even today) contain chemicals that can actually eat away at the photographs. Even chemicals in wood and glue used to make a wooden cabinet can seep out and cause damage to photographs. Those ‘magnetic’ photo albums that are so common, where the photos stick to the page and then are covered with a plastic sheet? In most cases, both the glue that makes the pages sticky and the plastic sheet covering the photographs can be bad for the photos. Did you or your ancestor glue photos to album pages? Think the glue was archival quality non-acidic glue?
Slides
Let’s start with slides. Slides have the best longevity of various photo mediums, although they too will fade over time. Kodachrome, the first successful color film, uses a technique unique among slide films that contributes to being stable in the dark for well over a hundred years. One study estimates that it would take 185 years before the least stable dye (yellow) in Kodachrome would fade 20%. Another problem among film and prints is their tendency to turn yellow over time, something Kodachrome also is uniquely (for films dating back that far) immune. In recently years, let’s say the past 25 years, films and papers have improved significantly, but nothing matches Kodachrome which was invented in the 1930s.
During the 1940s through the 1960s or so, Kodachrome was the film of choice. Many families would sit in their living room and watch photos of their family trips projected onto the wall. Ironically, Kodachrome will fade faster than other slide films when left in a projector. So what happened to all those slides from all those families? Frequently they were actually left in the slide carousels which were stored in boxes. A family might have kept a stack of these boxes, and whenever they wanted to see photos of a particular trip they would open the box, take out the carousel, put it in the projector and watch. Carousels came in a few different types – some round (the carousel would rotate the whole carousel) and some straight (the projector would move through from beginning to end). It’s important to note that the order of film in a slide carousel is not necessarily the order of the film shot, nor even from the same roll of film. Sometimes families would buy pre-made slides of the place they visited (perhaps shots they would never be able to take) and mix them in with their own slides, to better show off the place they had visited.
As this blog does focus on Jewish genealogy, I should point out that Kodachrome was invented by two Jewish musicians. Indeed, while they had studied chemistry and physics, they were, for lack of a better term, hobbyists when it came to photography. Jews were not hired as chemists in those days, so they worked in their kitchens on their ideas for color film. When they made progress, Kodak wouldn’t hire them, but private funds helped them set up a laboratory on their own. As they made progress Kodak finally bought the rights to any film they developed, but still not willing to pay them, did so in a deal offering them future money per foot of film sold (thus no risk to Kodak). That ended up working out pretty well for a couple of Jews who couldn’t get jobs in chemistry, yet ended up creating what would become the most popular color film for decades to follow. Both would continue in their careers in music following the creation of Kodachrome.
Okay, history lesson over. You’ve collected your slides, in carousels and/or boxes, now what? The first thing I suggest doing is labeling your slides. Every single one of them. This takes a bit of organization first.
First, organize the slides into rolls (i.e. organize them into the original order they were shot on the individual rolls of film). If your slides were already in one box per roll and properly ordered, you’re ahead of the game. If not, try your best to organize the slides into rolls. You might choose instead to organize them around the original slideshows if you found the slides in carousels, but then you might also find boxes with slides that didn’t make it into the original slideshows and you’ll have to decide how to fit those in as well. Assign a name to each roll (or slideshow). If, for example, you’ve collected slides from different people, you could organize them by naming them after the person who took the photos and assigning a roll number. So if you received a box from your cousin Robert and a stack of carousels from your grandfather Charles, then you might have a roll labeled robert01, another named charles04, etc. For each slide you will label the slide with the slide number, so for the roll robert01, the 22nd slide would be labeled robert01-22. We’ll get to how to label them in a minute.
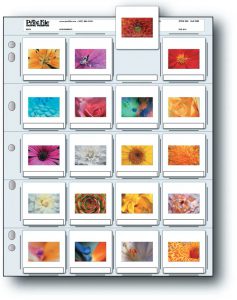
Second, put the slide into archival plastic pages. These are essentially pages that fit into 3-ring binders or which you can hang in hanging filing systems. They usually will hold 20 slides, so in most cases you will need two sheet per roll of film. You can find these in most photography stores, archival suppliers, and many places online. Some major manufacturers of slide protector pages:
Photo retailers probably sell the pages from Print File. Other companies make their own. The most important thing is that the material used to manufacturer the sheets is archival – for slides this will usually be polypropylene (negative sheets may use polyethylene as explained below). You might notice that different companies manufacturer these in different thicknesses, measured in mils. Archival Methods sells their sheets with 2.5mil polypropylene. Light Impressions actually sells their sheets in two different thicknesses, 3 mil and 5 mil. Print File manufacturers their pages out of 8 mil polypropylene. You can decide which brand you prefer.
Each of these companies also sells binders or binder boxes (my personal favorite), for storing these pages. Keep in mind that if you are going to go to the trouble of getting archival sheets to store your slides, you should also get an archival binder. You can also buy sheets intended to be hung in a filing cabinet. If you have a filing cabinet this might be a good option, just keep in mind you want to make sure everything in the filing cabinet is archival (so if you’re planning on sharing the space with your bills and other documents, this might not be such a good idea).
You might be asking, what is ‘archival’ and how do I know if something really is archival? Well, the basic answer is something is archival if it contains no materials that will contribute to the deterioration of the items stored within. As mentioned before, even the glue in a wood cabinet can seep out fumes that will ruin your photos. For example, based on the issue with cabinets, many professionals will only store their photos in steel cabinets. As to how you know if a particular product is really archival, there is an organization called the Image Permanence Institute (IPI) which has a test called the Photographic Activity Test (PAT) which tested products for their effects on photographic materials. If the product shows it has passed the PAT test, you should be safe.
The PAT test applies to anything that comes in close contact with your photographs and film, and indeed even when having your photos framed you should make sure the mat surrounding the photo has passed the PAT test. If you’re buying a frame with a pre-cut mat in a retail store, it might not be so easy to find that out, but if you’re having a photo professionally framed, the framer should be able to tell you if the mat they use has passed the PAT test, or should be able to find out from the manufacturer.
Okay, so you’ve organized your slides into rolls and placed them into plastic sheets, with an assigned roll name written on the top of each sheet. Now we get to the hard part, labeling each slide. If you received the slides from a relative who is still alive, I recommend now visiting them with your newly organized slide pages and going over each roll and determining who is in each photo and when and where the photos were taken. This might not be so easy if you have not yet scanned the photos since slides are hard to see, especially by elderly relatives, but you can either scan the slides first, showing the photos on the computer, or bring along a slide viewer (a small hand-held viewer that magnifies the slide a bit works well). Once you know everything you can about every slide, you need to create labels. This is really only possible by computer, and let me explain how.
Labels
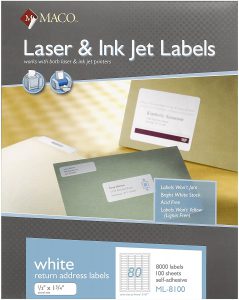
I used to use Avery 5167 return-address labels for this purpose, as they are actually the exact size necessary to fill either the top or the bottom of a slide mount. This is a well-known fact among photographers. If you find some special ‘slide label’ for sale, you’re probably just overpaying for an inferior product. That said, there is a problem with the Avery labels, and that is that they are not archival. Avery does sell some archival products, but apparently their return-address labels are not among them. The good news is that some of Avery’s competitors do provide acid-free and lignon-free labels that are the same size.
Maco ML-8100 Labels
One company, Chartpak, has a product line called Maco and a product called ML-8100 which is similar to the Avery 5167 and is acid-free and lignon-free. I doubt they have submitted their products for the PAT test (since it is not intended for archival purposes but for return addresses), but Avery is not acid-free or lignon-free so I would suggest going with Maco or another company that does claim their labels are acid-free and lignon-free.
All of these companies provide templates that you can use for their labels on their web sites. (Avery’s 5167 Templates, Maco’s Templates). Microsoft actually provides Avery templates with Word I believe. Avery also has free software you can use for printing their labels. In any case, you open up the template and fill in the information on each slide. I recommend putting the unique identifier you’ve come up for each slide (i.e. robert01-22 in the above example) on the top line, then following it with date, location, event and who is in the photo. There is a lot of copying and pasting here, since the information is largely repetitive. Once you’ve filled out the template, print out the labels and affix them to each slide.
Great, so you’ve organized your slides into rolls, inserted them into plastic sheets, collected all the information on each slide and labeled them properly. That’s a huge amount of work, believe me. If you’ve done this, you owe yourself congratulations.
Negatives
Moving on, we have negatives. I’ll be discussing 35mm negatives, but the idea is the same with other sizes, if not specifics. There are generally two kinds of negatives, black and white, and color. Color negatives only became available in the 50s and probably only became really popular in the 70s.
The good news is for black and white negatives, their longevity is quite good. Black and white negatives are usually formed by particles of silver, and thus do not fade like color dyes. The bad news here is that color negatives don’t last as long as slides. They fade quickly, and if you left them in the original envelopes you received from the photo processor, they were not kept in the best conditions. If you have old color negatives, they may have already faded beyond usefulness.
The other problem with negatives is that they are obviously harder to check. Most people can’t easily look at a negative and know the quality of the print that will come from it. If the negative has faded a lot you might not even be able to see the image, which would be a good hint, but most people will not be able to tell too much by looking at the negatives themselves. What this means is that you either need to print from the negatives to find out their quality, or scan the negatives. As my suggestion with all photographs is to scan them immediately, this is obviously the path I would take. It’s up to you if you want to put your negatives into pages first, or test them out by scanning first. Personally, unless you can’t see any image at all on the negatives, I would put them into archival pages and then scan all the images.
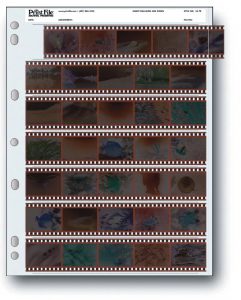
Print File Negative Page
The same companies mentioned above sell pages for preserving negatives. These work similarly to the slide pages, except you slide each negative strip (usually 4-6 frames per strip) into the page. There are seven slots, so depending on the number of frames per strip (decided on by the photo processor) and the number of frames in the roll you may need a second page for the roll. Obviously if your roll was 36 frames and you have a 35-frame page (5 frames per strip, 7 strips per page), you will need to find a spot for that last image in a different page. If I’m collecting negatives from a series (i.e. from the same trip) I usually will keep a page for those extras and keep them together.
There are different materials used for these kinds of negative preservers.
First, there’s polypropylene like that used for the slide sheets. Polypropylene is used for slides because it is very clear, and since people tend to look at their slides while still in the sheets (by putting them on a light table, or holding them up to a light source) it is important to be very clear. One negative aspect of polypropylene is that it has a tendency to attract dust, and you don’t want dust on your slides and negatives. Keep in mind with polypropylene pages to check your slides and negatives for dust before scanning. Use a can of compressed air to clean them before putting them in the scanner.
Another material used for negative pages is polyethylene. Polyethylene is not as clear as Polypropylene, which is actually a benefit since it means less light coming through to the negatives. Since people tend not to view negatives through these sheets and don’t need color fidelity when looking, the clarity of polypropylene is not a benefit for negatives. In addition, the fact that polyethylene does not attract as much dust as polypropylene, means it’s better for archival purposes. Thus, for negatives I would use polyethylene pages. Truthfully, I’m not sure if all the companies sell polyethylene pages for negatives, but I know Print File does, and I recommend their pages.
There is a third material available, called either Mylar or polyester. This is even clearer than polypropylene and relatively expensive. I don’t think it is necessary, and certainly not for negatives. Print File actually sells polyester sleeves that fit around individual strips of negatives, and then are inserted into polypropylene pages for storage, thus allowing you to take out the individual strip for viewing in the clearer Polyester protector. This is overkill in my book, and really only intended for professional photographers.
When it comes to labeling negatives, you obviously have no place to put labels on the film itself. I would thus suggest naming the roll just like you did for the slides, and then typing up a description of each frame in the roll to keep with the film. You can just keep these descriptions on your computer, or since you’re putting the negatives in binders anyways, you can print out the descriptions, hole-punch the sheet and put it in with the negatives. Remember if you’re putting paper into the binder to use acid-free lignon-free paper!
Prints
Preserving prints probably deserves its own posting as this one is already getting way too long, and there is a lot to discuss. I’ll try to be brief. Basically if you have a box full of family photographs, or a stack of albums, you should consider putting all the photographs into archival binders. It is unlikely that 50 year old photo albums are made of archival materials and your photographs are literally being eaten by these old albums.
Print File square print page
Unfortunately, when it comes to prints, it’s not usually as a simple as just placing the photographs into sheets. There is usually a process of removing the photographs from their old albums. Even those ‘magnetic’ albums which were supposed to be easy to remove photographs from can over time permanently attach themselves to the photographs. As mentioned early, it was common in the old days to glue photographs into albums. It’s not so easy to remove a photograph from a glued-in album. There are various techniques for doing this, and it depends largely on the specific type of album and glue being used. As such, I won’t go into detail on this topic, but I will say that if you have any doubt about your ability to remove a photo from an album, you should consider it very carefully, and in either case scan the photograph first. In my case, I usually remove those that are easy to remove, scan those that are difficult to remove, try to remove the difficult ones, but if I think I may damage them I just leave them in the old albums and am content to have the scan. After I finish I scan the photographs I removed from the old albums and put them in archival storage.
Old photographs came in different sizes than we are used to today, usually smaller than out current standard print sizes, and usually square instead of rectangular. Print preserver pages tend to come in the standard sizes available today, not in sizes from 50 years ago. As such, I try to find sheets that have slots the same size or slightly larger than the prints I am preserving. As the sizes can vary greatly among the prints I’m preserving, this means buying a variety of different sizes. Since the prints are smaller than the pockets they are being put into, and you want to be able to use both sides of the sheet, I buy non-acidic paper inserts to go into each pocket of the plastic pages. Thus, even if a picture on one side is very small, you will have a nice white background behind it, instead of seeing through to the print on the other side. This also helps isolate the prints on either side of the paper from each other. Make sure the paper is non-acidic. Basically buy it from an archival provider. Archival Methods sells inserts for all their print pages.
Needless to say, if there is any glue or other adhesive on the prints you find, you should try your best to remove it as the fumes from the glue can damage your photographs over time.
So you buy the plastic print preservers with matching paper inserts (i.e. if you buy a package of 25 sheets of 4×6 print pages, which hold 3 4×6 prints each, you need 75 paper inserts). Insert the paper inserts into the pages, and then put in the prints. With very small prints where you can fit more than one into a sleeve you can do this, but be aware that the print can move around and overlap which could be problematic. I would try to stick to one print per side of each sleeve as best you can, which is why I suggest buying a variety of sizes of print preservers.
Labeling the prints is important, but obviously do not write on the prints themselves! You can buy archival labels and affix them to the plastic sheets with information on the prints underneath them, or you can number the print preserver sheet and write up the print descriptions separately. After you scan them you can even create index sheets with thumbnails of each photo with their description of each photo next to them, but if you’re going to put that paper inside the binders, remember to use acid-free lignon-free paper.
Like I mentioned earlier, I like to put my photographs in binder boxes, which most of the archival companies sell. Binder boxes are basically boxes with a the rings of a three-ring binder inside. The boxes must also be archival (and pass the PAT test) but if you source them from a reputable archival provider, that shouldn’t be a problem. These boxes tend to be very sturdy and protect your photographs from being banged around. As they are closed, they also prevent photographs from falling out of the sheets since there is no place for them to go. They are also stackable, which is sometimes very helpful when finding where to put your precious photographs.
Once all your slides, negatives and prints are in their pages and the pages in their binders, now all you need is to find a safe place to put them. Make sure it doesn’t get too hot, there isn’t a lot of humidity, and there are no chemical fumes. Basements and attics are thus not usually the best place to keep photographs.
I suspect this is my longest posting so far. Maybe too long. Hope it was helpful to someone.
This website uses cookies to improve your experience. We'll assume you're ok with this, but you can opt-out if you wish.AcceptRead More
Privacy & Cookies Policy
Privacy Overview
This website uses cookies to improve your experience while you navigate through the website. Out of these, the cookies that are categorized as necessary are stored on your browser as they are essential for the working of basic functionalities of the website. We also use third-party cookies that help us analyze and understand how you use this website. These cookies will be stored in your browser only with your consent. You also have the option to opt-out of these cookies. But opting out of some of these cookies may affect your browsing experience.
Necessary cookies are absolutely essential for the website to function properly. This category only includes cookies that ensures basic functionalities and security features of the website. These cookies do not store any personal information.
Any cookies that may not be particularly necessary for the website to function and is used specifically to collect user personal data via analytics, ads, other embedded contents are termed as non-necessary cookies. It is mandatory to procure user consent prior to running these cookies on your website.